Showing posts with label Food. Show all posts

Wednesday, August 13, 2014

Blackberry Picking with Baby

Blackberry picking is one of our little family unit's summer highlights. Every August here in the Pacific Northwest, like it or not, these purple jewels take over the landscape. To some, they are noxious weeds to be obliterated, to others it is foraging at its finest. Every year Ryan and I brave their thorny defenses to pick several pounds of delicious blackberries. To eat, to freeze, to make our one year supply of jam, to fold into crepes, pies and crisps, to toss into breakfast cereal, to whizz into assorted beverages, and to do whatever else we like with them. One year, I discovered that if I made a sort of syrup out of them, I had the makings for a wonderfully summery (but completely unconventional) Blackberry Vodka Martini. So.much.flavor.

This year, with a nine-month-old in tow, it gets trickier. Since Johann was born we've continued doing the things we enjoy, and venturing out into the brush for berry picking is no different. (So far this year we've already foraged and enjoyed several different berries including salmonberries, red huckleberries, and thimbleberries.) With Ryan's help, it's relatively easy. One of us back-carries him in the Ergo, and aims for the easiest picking, while the other one dons long pants and boldly goes forth into the brush. Easy. So, I thought, why not try going on my own and just head for the easy picking?

So last week, I front-carried Johann (I cannot yet strap him onto my back without help) and we ventured out alone. We got in thirty minutes of picking before before nap time hit. Isn't this the sweetest grumpy face, you've ever seen?


We made it out alive, relatively unscathed, armed with two pounds of ripe blackberries. Not bad for a short time and a few extra challenges.    

I've learned now that blackberry picking with a baby strapped to your chest presents several challenges.


One: you have to go where the blackberries are, which usually means off the trails and into full sun where the best berries (and the thorniest brambles, unfortunately) reside.

Two: you have to pass up several obvious precious clusters of ripe fruit, they're now out of reach because of the much more precious baby strapped to your chest.

Three: not only do you have to try a little harder to keep your balance, and stay away from the thorns, you also have to keep your baby from reaching out and grabbing thorny leaves and branches! Oye. There were tears.

Bottom line. It takes time and effort, and maybe some pain if you get stuck by thorns, but there is good fruit out there for the picking, it is free, all natural, and we take advantage.


And, at the end of the day, with the baby unit, blackberry picking is so much easier with the help of another. So we plan to carry on this family foraging tradition, and raise Johann to find joy in free and delicious fruit. But next time, I'll bring the dad unit!

Monday, July 1, 2013

Yellow Beets, & Yellow Beet Risotto

I found some bright, delicious-looking organic Yellow Beets at the farmer's market on Saturday. Gorgeous, huh?  I've been in a risotto sort of mood lately, so, despite the 90-degree weather Seattle has been experiencing this week, I decided to turn on the stove and make a yellow beet risotto.

Yellow Beet Risotto

Boy, am I glad I did. I used my basic risotto recipe, using red onion instead of white and skipping the garlic and wine (you don't need them here!), and substituted the yellow beets plus their chopped up greens in place of whatever veggies I would normally use. A splash of balsamic vinegar, and a sprinkling of goat cheese added the final touches and kicked it up a notch! It was the perfect dinner on a warm summer evening. It tasted like summer, and was just oh-so-yummy!


Yellow beets - I will definitely be cooking with you again.  

Thursday, June 27, 2013

Foraging: Red Huckleberries!

Red Huckleberries are slowly starting to ripen in our area. Red Huckleberries, while abundant in the Pacific Northwest, are a pain to pick because the berries are tiny and the entire bush moves when you pluck just one. But the effort is well worth the reward. We only learned about these babies in the middle of its season last summer, but are ahead of the game this year so will be taking full advantage of the entire picking season!


We enjoy eating these little red gems just plain on cereal, granola, or sprinkled into salads. But local experts have many more clever recipes that use red huckleberries. The berries are a bit on the tart side, but juicy and slightly sweet, making it perfect for jams as well. And, boy, are they delicious any way you eat them!  


Unable to wait a minute longer, we picked a modest 4 oz. at the park down the street from our house last night in the last few minutes of sunset, deciding to save more serious picking for the next few weekends. If we can get to them before the bears do! 

Monday, June 17, 2013

summer's first strawberries

The little strawberry patch has been thriving at our new place, and the first berries ripened over the weekend. We picked nine strawberries and found them to be so precious a treasure that we ate them right away, savoring them to the last juicy bite. There might have been a couple more berries, but, alas, it looks like we had to share them with birds and other creatures. This is definitely one drawback to pesticide-free, organic gardening, but it's a price we're willing to pay for what we get out of it.


We'll have more strawberries ripening soon, and I can't help but remember how impatient I was last year when we put this patch in, picking off the blooms that first year and urging the plant to hurry up and grow! And now I think this was so worth waiting for. Look at how gorgeous our berries are!


I've been amazed over the years at how easy it is to grow and care for strawberries, and how sustainable a crop it is since it expands and produces more all on its own. You won't get a yield the first year, but the following year you will have several berries and be amazed! We started our patch with five June-bearing plants last year, deliberately picking a mix of two different varieties that do well in the state of Washington, and now we're seeing pretty decent results, with having put in very little weeding or maintenance the past year. At only 2 feet by 8 feet, this a small strawberry patch by most standards, in a sunny but otherwise unused spot along the side of the house. It will yield enough for us to enjoy in-season, but not enough to can or freeze or do anything. So we're starting to scout out a little more space in unused corners of our yard, to put in a new patch, and hopefully, double our yield in two years. Maybe then we will have enough to make jam, and freeze for our smoothies, desserts, and whatever else we do to enjoy these babies through the rest of the and until the following June when we will see them again. This is too precious, too sustainable, and too easy a fruit to grow to ignore its potential!


Friday, May 10, 2013

Farmers Market Opening & Potato Leek Soup

Our local farmers market opened for the season last weekend. We were there bright and early, sporting reusable totes and big smiles on our faces. The weather could not have been better, sunny and in the upper seventies, and lucky us since this is atypical for our area in early May. We wandered around with our friends, took in the sights, smells, sounds, colors, fed the Alpacas and returned home armed with plump happy fruits and veggies for the week including the freshest, biggest bunch of Leeks one could find (for $2!).

We whipped up this rustic, comforting, potato leek soup that same day and savored dinner out on the back porch enjoying those last few moments of warmth just before the sun went down.

Potato Leek Soup
Serves 4-6

You will need:

3 Tbsp butter + 1 Tbsp olive oil
3 good sized leeks, chopped up (use only the whites and light green portion)
4 smallish Yukon gold potatoes cubed (we leave the skin on)
5 cups chicken or veggie stock
1 bayleaf
freshly cracked black pepper – optional

Add butter and oil to a heavy bottomed pot and let butter melt over low heat. Stir in the leeks. Cover and cook on low for about 10-12 minutes, stirring every once in a while to prevent the leeks from burning (trust me it’s easy to burn them, been there done that). Add bayleaf, potatoes, and veggie stock, bring to a boil then cook on low for 10-12 minutes or until potatoes are done. Toss out the bayleaf. The soup is ready; it may be slightly thin right now, but it will thicken up and get a gorgeous velvety texture as it sits and the potatoes start to disintegrate even more (this recipe makes a ton for just two so your leftovers the next day will be awesome!). But I also think that is part of the rustic appeal of this soup.
Serve soup hot topped with freshly cracked black pepper if you like, with good fresh bread. Enjoy!

Tuesday, April 30, 2013

Foraging: Stinging Nettles

Since moving to the state of Washington, I have been swept away by the foraging possibilities - both abundant and nearby. I have been devouring all kinds of information on the subject, learning about different things to look for by season. Winter is over here in the Pacific North West, and that means yummy stinging nettles are in their prime.

Stinging nettles - which lose their "sting" after being cooked for one minute - are easy to identify, and deliciously yummy. They remind me of spinach, but maybe a bit woodsier. I now substitute them for pretty much any dark leafy green veggie in recipes. Not only are stinging nettles pesticide-free gifts of nature, but according to my research, they are also a nutritional powerhouse, chock full of all the dark-leafy-green veggie benefits including iron, calcium, and folic acid.


In early spring, we donned long sleeves and pants, gloves, and boots, and ventured down to the nearest trails to pick our first lot. A modest half grocery bag's worth.


Never having cooked with Stinging Nettles before, I wanted to tread lightly. Even my husband (who generally does not get as excited about food) was all too eager to help me pick them, probably in large part for the fact that he got to jump into the weedy shrubs, thorns and brambles and be a little boy again. And we had two other adorable helpers.


You are supposed to harvest only the top two or three bracts of the plant while they're still young, so they have a chance to keep growing (at which point you can go back and pick more yumminess!) and snip off the leaves to cook with.


Unable to avoid curiosity, we cooked up that first batch immediately. Oh.So.Tasty! You cook them for a minute (which will disable the sting), then however your recipe calls for your leafy greens to be cooked.


It cooks down almost exactly like spinach, in the fact that it loses as much water.


Since then, we have gone back again and again and have picked many more bags full. Boy-oh-boy we have discovered a whole new world and have had so much fun experimenting with it in different dishes. Stinging nettle and garlic homemade deep dish stuffed crust pizza, anyone?

Or, simply tossed into boring old spaghetti sauce? Or, perhaps a semi-foraged version of delicious Indian Palak Paneer? The possibilities are endless. Thank God for these simple delights of nature.


Saturday, March 30, 2013

Banana Nut Pancakes, the Lazy Girl's way

Banana pancakes are good. Nut pancakes are better. When you put them together, they're great. But when you want to enjoy a quiet, lazy Saturday morning, and still make the most of the day, you get this. Banana Nut Pancakes, courtesy of the Lazy Girl (that would be me).


Banana Nut Pancakes

How do I make this happen, you might ask? Start with any pancake batter of your choice. Slice up a ripe banana or two, and find some nuts. Proceed to pop all but half the amount of banana slices in your mouth, then save the rest for your pancakes. (After all, that was the original intent except for the fact that banana slices are so yummy.)

Top each pancake like a pizza with a few banana slices, and a sprinkling of nuts just after you put some batter in the pan. Like so.


Flip and cook as you would normally. 


Easy, caramelized, deliciousness. Genius, no? Drizzle on maple syrup. Or don't...feel free to be boring like that. Enjoy!

Wednesday, October 10, 2012

Pumpkin Dumplings

Last Saturday, we visited this farm. They have all the lovely Fall-type activities including a big pumpkin patch, gigantic corn maze, apple orchard, and a petting zoo (for the child inside all of us). Bonus you get a stunning view of snow-capped Mount Baker towering in the horizon. So this is one of my new favorite places to visit seasonally in the state of Washington. We came away from the crisp autumn afternoon warmed with fresh hot apple cider, happily hugging our stash of fresh picked apples and pumpkins that will probably feed us until next year.

I have a love affair with pumpkins. I know I've shared some favorite pumpkin recipes before, but now I have a new one to add to the list, pumpkin dumplings! (By the way, the secret reason for all this experimentation is to get my husband to eat pumpkin in various forms, so I can continue to cook it. He hates pumpkin pie with a passion. I know, he's crazy right?) 

So, pumpkin dumplings...here we go! If you're a fan of pretty much anything mixed with pasta sauce, you'll love this.  This sort of looks and tastes like gnocchi, except it tastes a bit like pumpkin too. Making it is as easy as can be.


Pumpkin Dumplings

This portion serves 8, which makes about the equivalent of cooking up an entire box of pasta.

You will need:

2 eggs
2 cups pure pumpkin (pureed with a little water if its too firm)
3 1/4 cups flour
pinch of nutmeg

Mix everything together in a large bowl until well incorporated. I like my large spatula and wooden spoon for this. The dough will be sticky, that's okay. Bring a big pot of water to a boil, add salt when boiling, and drop the dumplings one teaspoon at a time into the boiling water. Let them rise to the surface and cook another minute like that. Should take about 2-3 minutes total. Scoop out with a slotted spoon when done. When all dumplings are cooked, you're all set. But, when you're ready to eat them, sautĂ© them up with a teensy bit of olive oil and butter, mix with any kind of green leafy veggies that you like, top with plenty of freshly cracked black pepper, freshly grated parmesan, and serve hot. Enjoy!


Wednesday, August 8, 2012

Kale Harvest


I bought a package of Kale seeds and planted some, even though it was not in the plan for my little veggie garden this year. I was hesitant, never having planted kale before, but figured it would be worth the try since we've been eating more and more of it lately. I planted roughly a 1'x2' area and it grew so well, and so abundantly and thickly that this harvest here is only about one-fifth of what remains. I may need a bigger salad spinner. Yippee!


If you have even the tiniest patch of dirt I encourage you to plant some Kale. It's very good for you (I'm no expert on the details of that!) and it was so easy to grow. Plus, you could buy a package of organic kale seeds for less than $2, and probably get pounds and pounds of kale out of it versus spending $2 or $3 for a single bunch at your local grocery store or farmer's market. Do it!

Saturday, July 14, 2012

Saturday, July 7, 2012

Salmonberry Salad

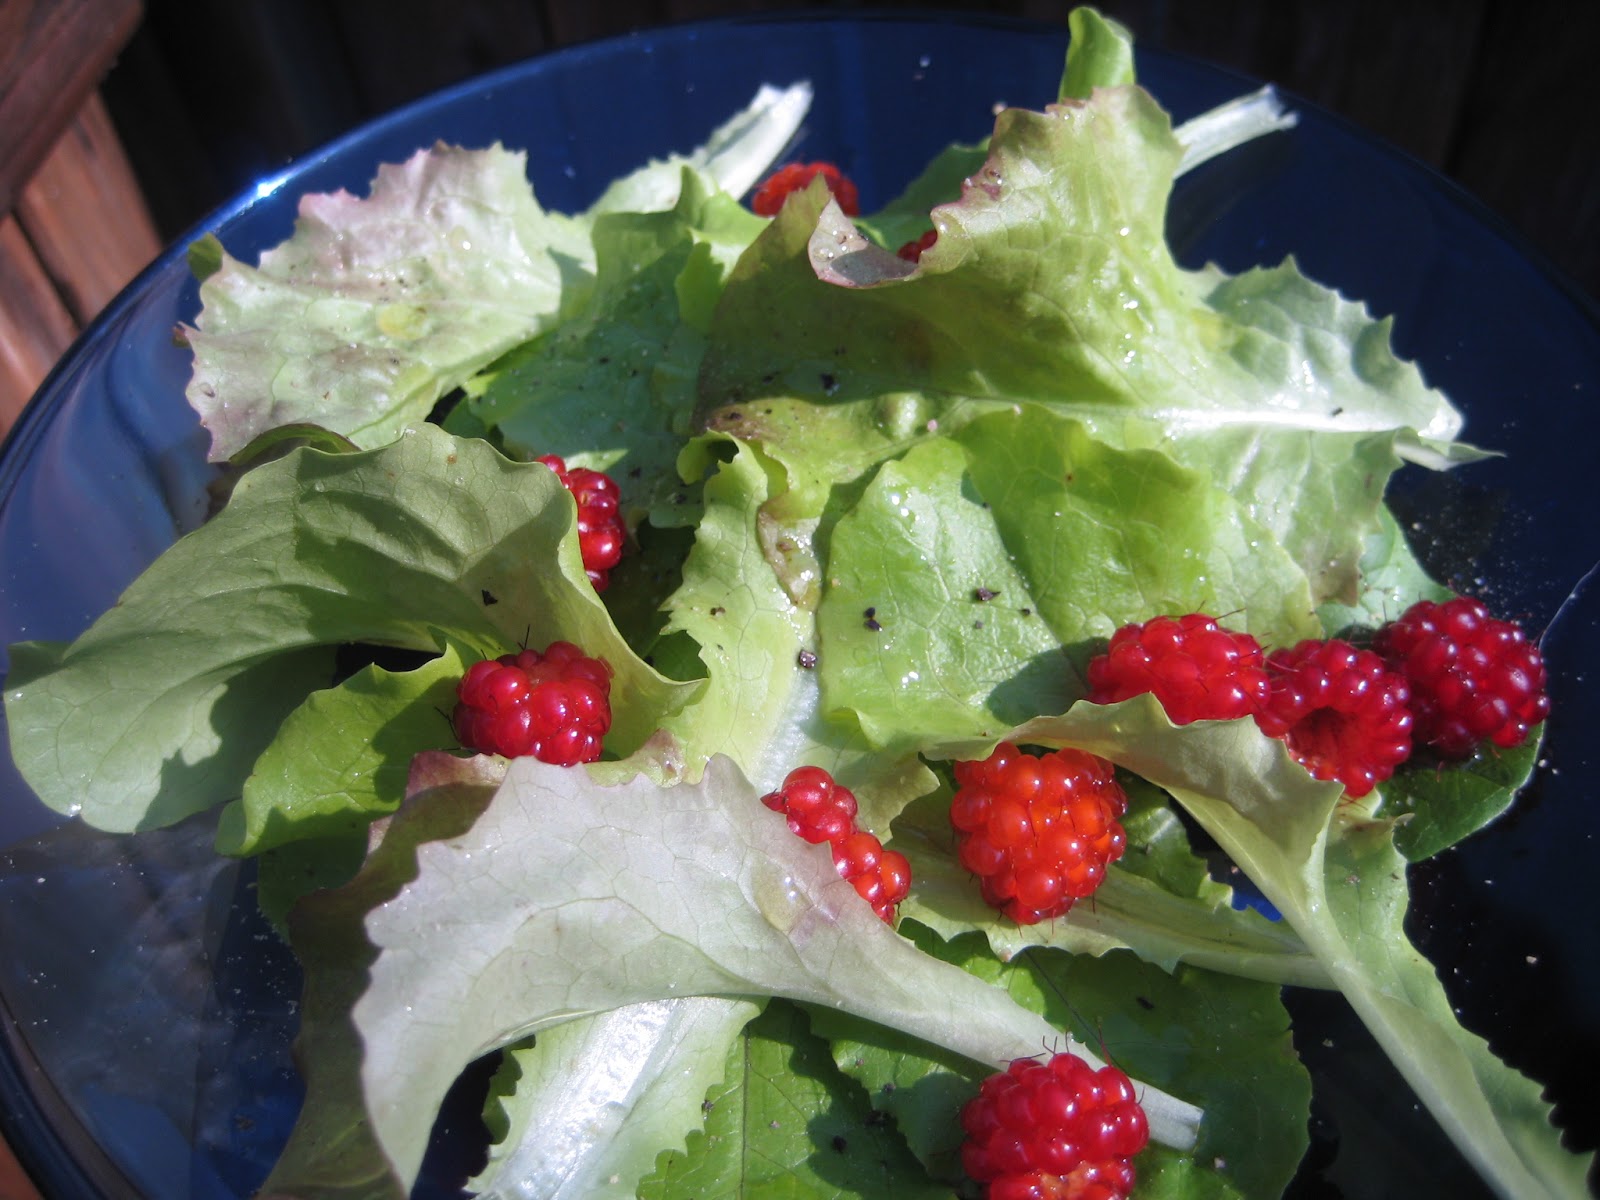
The simple joys.  Picking delicate baby greens from the garden.  Tossing in bright ripe salmonberries picked mere minutes ago.  Dotting with olive oil, and freshly cracked black pepper.


The result: a simple, joyful salmonberry salad.  Happy Saturday, everyone!


Friday, June 22, 2012

Foraging: Salmonberries!

foraging:  the acquisition of food by hunting, fishing, or the gathering of plant matter.


I've been reading about foraging lately.  It's a new love.  So far our foraging has been limited to picking berries. Still, a whole new world of food possibilities has opened up!  And it's all free, that F word I really love.  Last year we picked blackberries.  This year, we have a new find:  salmonberries.

The salmonberry is another edible fruit native to the state of Washington.  The seem perfectly good to eat plain when ripe, or cooked up.  We made Salmonberry Tarts two weeks ago.  Last week we ate them in crĂŞpes for breakfast.  Naturally sweet, a bit tart, full of good fruity yummyness.


Salmonberry CrĂŞpes


Oh yes, sweet little salmonberries, we will be back to pick more of you in the coming weeks, before you disappear.  Until next June! 


Wednesday, June 22, 2011

Dreaming of Italy: Prosciutto e Melone (Prosciutto and Melon)

I want to go to Italy. I want to drink Italian wine. I want to eat fresh spaghetti with tomato and basil. I want to sit at a road side cafĂ© and sip espresso that's as thick as melted chocolate. I want to visit Firenze and stand in awe of the art and architecture of the Renaissance. I want to go to Napoli, and eat authentic Napolitano pizza. I want to stand on a terrace and look out over Rome in all its past and present glory. In short, I want to be Elizabeth Gilbert in Eat Pray Love and do nothing but eat great food and experience "the sweetness of doing nothing”.

So, until this trip to Italy happens, for now, this will do. My homemade version of a classic Italian savory treat, Prosciutto e Melone. Cantaloupe wrapped in Prosciutto. I added just a touch of basil and balsamic vinegar. We enjoyed this treat tonight, and it was so filling, it was basically dinner!

I can practically hear the sounds of the street by the cafĂ©. After all, in my head I’m in Italy anyway.

Prosciutto e Melone (Prosciutto and Melon)


Really simple to put together, and this can be made ahead of time. All you need is some Cantaloupe, sliced or balled, thinly sliced Prosciutto, a bit of balsamic vinegar, and some basil (optional). Assemble Prosciutto and Melon as shown, drizzle on some balsamic vinegar, and serve. Enjoy!

Thursday, April 28, 2011

Curried Crab and memories...

We went out on a date yesterday, to a Malay restaurant, and I ordered Curried Crab. Not only was it a fun date with my husband (they usually are!), but the crab was totally delicious too, in all of its 2lb glory. It brought back so many memories from my childhood of my mom's crab curries. I remember waking up early in the morning and going to the fish market with her, picking out the liveliest, crawliest, and freshest crabs! Caught that morning, and still wet from the sea. Best of all was the smell of mom's crab curry filling up the entire house. Such a treat!


This crab was impressively larger than its counterparts from my childhood....and it tasted pretty good, but I think I really prefer the memories.

Tuesday, March 1, 2011

A Terrific Way To Clean Shrimp!

I recently learned this genius new way to clean shrimp, which gets rid of that "shrimpy" smell. This technique is credited to my new chinese friend, from our little International Cooking Club (we did China last week). The smell I am talking about seems to be one main reason that people who don't eat shrimp (for reasons besides allergies) continue to avoid it. It does a wonderful job of cleaning shrimp, and getting rid of the smell. Here is the method, for approximately one pound of shrimp. All you need is salt, cooking wine (whatever you have - I used sherry), and cornstarch! It doesn't get any simpler.


Peel the shrimp, pull off the tails, and remove the yucky black stuff from the ends, then rinse thoroughly in water. Then, add about 2 generous teaspoons of salt, and about 1/4 cup of the cooking wine. Mix thoroughly (yes, with your hands) to make sure all shrimp are coated. Then add about 2 or 3 tablespoons of cornstarch and mix well for about a minute. Then rinse well and wipe all the moisture off and make sure they are thoroughly dry. Your shrimp is now ready to sautĂ©, steam, grill, bake, or cook any way you want!
I just cleaned a whole lot of shrimp and prawns this way and will be posting several shrimp and prawn recipes this week!

Thursday, February 10, 2011

Oranges, picked fresh off a tree...and Girl Scout Cookies

Two really random things happened today. They may have been random, but they sure made me smile.

First, a guy came in to my work place today to pick up something - this was in the middle of a particularly busy morning. While I rushed about trying to get his stuff ready, he patiently waited off to the side and then asked me "do you like grapefruits or oranges?" I was a bit flustered, and yet a bit curious to see where this would go, so I answered "oranges". He then asked, "what kind?" I answered "those little Florida tangerines." He said "I'll just go see if I have any of those." He immediately ran out to his car, and disappeared under the front seat. He came back in three minutes later with these two gorgeous oranges.
He proudly announced as he handed them to me "I just picked them this morning!" Leaves and stems still on and everything. What a sweet gesture.

The second event happened this evening when we were on our way to the hospital to visit Ryan's mom in recovery from a minor surgery. We stopped to get flowers, and right outside the flower shop - sheer feet inside the doors keeping out -6 F temperature - a brave little Girl Scout troop had set up a booth and was selling cookies.

Oh my. Girl Scout Cookies. Probably the most dangerous of all impulse buys. 

We came away with three boxes. Enough said.

Friday, January 21, 2011

International Cooking Club, And Chana Masala

A few months ago, a friend of a friend invited me to join an international cooking club that was just being formed in our town. That's right - a cooking club, right here in my little corner in the middle of nowhere, Wisconsin. Who knew my little town of about four thousand-ish could be so cosmopolitan? :) It is not easy to meet new people in this town, so this club was really a huge answer to prayer! Anyway, there are now about ten of us, representing as many countries, and we each take turns demonstrating recipes from our home country, and generally sharing our the food culture with the others. Such fun!

Our next meeting is this Saturday, and it will be my turn to showcase a little bit of India. But, where to even start? Indian food is so diverse. You step fifty or so miles this side or that side, and it's like you're in a whole other country..the language is different, customs are different, the food is different, the clothes can be different...you get the idea, right? I really hope to take more turns in the future, so I can at least skim the surface and show a few more dishes.

Now, there are a few rules so we can accommodate everyone's dietary needs...for instance, no meat, vegetarian stuff only, and limited dairy products. So, I could immediately kiss goodbye to the idea of showing off my beloved fried fish, or any of my favorite chicken curry recipes. The rules are probably a helpful thing for me, in any case, because I was having way too much trouble picking from among my favorite dishes. However, one of the four dishes I am choosing to show is this Chana Masala. This savory concoction of chick peas (garbanzo beans) and spices goes with just about any carbs you can get your hands on......rice, sliced bread, naan, whatever. It is a home favorite, and the ingredients are easily available. I can't wait to show it at cooking club on Saturday. Here is the recipe:

Chana Masala
(Chick Peas Simmered In Spicy Gravy)


You will need:
1 can Chick peas (Garbanzo beans)
3/4 cup finely chopped onion
1/2 cup finely chopped tomato
2 tablespoons coriander powder
1 teaspoon red chilli powder
1/2 teaspoon salt
2 tablespoons veg oil
1 teaspoon mustard seeds
1 teaspoon butter
1 1/2 cups of water
1 teaspoon lemon juice
cilantro leaves for garnish

Serves 4.

Rinse and drain chick peas and set aside. Heat oil in a saucepan on medium heat. Once the oil is hot, add the mustard seeds and allow them to 'pop'. Add the chopped onions and saute till translucent. Add the chopped tomato and saute. Add coriander powder and red chilli powder and mix well. Stir in the butter. Once the butter has melted in, add the water and let the whole thing come up to a boil. Then, add the chick peas and salt and mix well. Lower heat to medium and let cook for about 5 minutes. When it starts to thicken, add the lemon juice. Stir, and remove from heat. Enjoy!

Friday, January 14, 2011

Oatmeal...My Journey From "Eww" To "Yum!"

When I was a little girl, I remember oatmeal ("oats", or "porridge", as it was commonly referred to in India) being the most unpleasant food that one could conceive of eating - to be quite frank - an utterly disgusting breakfast that only old people ate. I turned my nose up at it. The odd thing is, I'm quite sure that as a child I only tasted it once....and I don't even have much memory of that experience, it had to be before I was six or seven years old.

The first time I ate oatmeal as an adult was three years ago, almost exactly to this day. My husband and I were getting ready for our first trip to India as a married couple, and I picked up a whole lot of Quaker instant oatmeal to take to my grandfather, who loves this stuff. While we shopped for it, my husband asked me why we never had oatmeal at home. So I gave him that "are you nuts?" look (wives, you know what I mean), and he immediately tells me that this oatmeal is actually really good, and probably nothing like the oatmeal I remembered from my childhood, and therefore had to at least try it. I'll try ANYTHING, at least once (as an adult, anyway), so I did. And, boy, was I mistaken as a kid. This was amazing! The instant stuff, apples and cinnamon or something like that. But still, delicious!

Oatmeal has become this special thing, a food that may be common to some but will always make me think of that stubborn little kid I used to be, my grandfather, and my husband...and how all these characters and memories have woven this beautiful collective experience for me. Of course, now my taste in oatmeal is entirely more "mature" and I'm proud to say that I have since developed a passable comfort-level in cooking the old fashioned, stove top variety (from scratch, mind you!) and look forward to a hearty bowl of oatmeal for breakfast fairly often. The recipe that follows is one of my most cherished ways to eat it. I would love to hear about your favorite ways to prepare and eat oatmeal!

Cranberry Walnut Oatmeal
with cinnamon and brown sugar


You will need:
1 cup old fashioned rolled oats
2 1/4 cups milk
pinch of cinnamon
pinch of salt
1 tablespoon brown sugar
1 tablespoon dried cranberries
1 tablespoon chopped walnuts

Serves 2.

Warm the milk in a saucepan on medium heat until bubbles form around the edges. Add the oats and salt, and let cook on medium-low heat for seven to eight minutes, stirring constantly. Around the two minutes remaining mark, stir in cinnamon and brown sugar, and mix well to combine. Add cranberries and walnuts, remove from heat, and let sit covered for 1 minute. Serve immediately. Enjoy!

Thursday, December 2, 2010

Butternut Squash Risotto

Who doesn't love a good risotto in the winter? An exquisite, slow-cooked, creamy bowl of bliss. This Butternut Squash Risotto came together last night, when I discovered that I had half a butternut squash sitting in the refrigerator, leftover from the Butternut Squash Red Curry I made last week, and needed to be used up. Boy, we have eaten a lot of squash lately. Eating in-season, indeed!

This recipe is definitely a keeper. Deliciously flavored with sage, and onions. Slow-cooked to creamy submission in white wine, and broth. You can use chicken broth or vegetable broth...or turkey broth, which was what I did (I kept the turkey bones from Thanksgiving last week, and made my own low-sodium turkey stock out of it last Monday night - super-easy - email me if you want the recipe). And, since it paired very nicely with the Turkey Cakes we had last night, this was a happy coincidence. Here is the recipe -

Butternut Squash Risotto


You will need:
Half of a butternut squash, peeled and cut up into 1/4"-1/3" cubes
2 tsp dried sage, divided
salt and pepper
7 or 8 cups low-sodium stock (any kind!)
1 medium onion, finely diced
2 tbsp butter
2 cups Arborio rice, uncooked
1/2 cup dry white wine
1/2 cup freshly grated parmesan
1 tbsp fresh parsley, finely chopped

This recipe makes approximately 6 servings.

Combine squash, half the sage, 1 cup of stock, and a sprinkling of salt in a skillet. Simmer covered until squash is tender but not mushy. This should take about 5-10 minutes depending on the size of the cubes.
Drain out the liquid and set squash aside.
Meanwhile, bring the rest of the stock to a boil in a another pot and leave it simmering.
Heat up the butter in a large skillet, and add sage. Cook about one minute over medium heat, then add the onion and cook until tender. Turn heat to 'low', then add rice, pinch of salt, and cook for 3 minutes stirring very well. Then turn heat up to 'medium', add white wine and cook until fully absorbed. Once this is done, add enough hot stock to fully cover the rice. Stir well and reduce heat back to low.
Simmer until stock is absorbed, stirring well throughout. Add another ladle full of stock (about 3/4 cup) and stir until absorbed. Keep repeating this process until all of the stock is absorbed and rice is fully cooked and tender. Time will vary depending on skillet size and heat - it could take anywhere from 20 to 30 minutes - this took about 30 minutes for me. When rice is cooked, add the squash, and parmesan cheese. Cook 3 minutes or so, until cheese has melted. Check seasoning, adding more salt and pepper if necessary. Serve hot, garnished with parley if desired. Enjoy!

Tuesday, November 16, 2010

Three Days Of Curries

I have really been into curry these past few days. Quite inadvertently, too. What started out as an innocent attempt to serve a nice Indian meal to some friends turned in to a "curry frenzy" in an attempt to satisfy all sorts of sudden cravings (women will understand).

It all started last Friday. Some friends came over for dinner and, because they had never eaten homecooked Indian food before, I decided to serve them a variety. I wanted one of those things to be a good chicken dish. Unfortunately, I only decided this on Friday morning, a mere six hours before my guests were due to arrive. So, I did something I hardly ever do. I tried a chicken with 'thin gravy' recipe from one of the Indian cookbooks I have (without first testing it), and served that. It was okay, and was a nice accompaniment to the rest of the meal. But it was decidedly bland compared to what I was actually craving. I kept dreaming of the spicy chicken curries I ate growing up (it is hardly the same as your grandmother's or mother's when you attempt to make it yourself!) And, previously mentioned cookbook shall remain unnamed due to the fact that I have now tried four other recipes from it with which I have been equally unimpressed, to say the least. One good recipe for every four bad ones does not a good cookbook make. Hmph. A big fat NON-kudos to whoever published it.

But anyway, I put away the first batch of chicken and was determined not to let the weekend go past without making a richer, spicier curry, one that WOULD put this craving to rest, and to have in the fridge for the coming week. So, on Saturday afternoon, I looked through one of my favorite cook books, Recipes For All Ocassions Part I, by Mrs. B. F. Varughese, and picked a new chicken curry recipe to try - she has two other ones in that book. (Mrs. B. F. Varughese was not only a great-aunt of mine, but also a well-known cook in India and probably the most trusted cooking authority within the extensive Syrian Christian diaspora.) So, I can't go wrong with this one! My mom brought me my very own copy of her Part I book on her first trip to visit me in the States. These books are not easy to find. I would love to get Part II and Part III as well (hint).

Needless to say, the second curry turned out really well, thanks to Mrs. B. F. Varughese's wonderful recipe. It is full of chili peppers...yum! So, here it is, with just three modifications - I left out the tomatoes because I didn't have any on hand, I didn't have fresh grated coconut so I substituted that with coconut milk, I don't cook with ghee (clarified butter) because the smell of it makes my husband want to hurl so I just used vegetable oil.

Chicken Curry


You will need:
All the meat from 1 good sized chicken
1/2 lb Potatoes
1 piece ginger
2 cups sliced onion
6 green chillies (I used 3 very large jalapenos, or you can use serrano peppers)
10 dry red chillies
1 tsp garlic
1 tsp cumin seeds
1 tsp mustard seeds
1 tsp turmeric powder
2 tbsp coconut milk
2 tbsp plain yogurt
4 tbsp veg oil
2 cups water
salt to taste

Grind the dry red chillies, cumin seeds, mustard seeds, garlic, and the turmeric. Fry the onion and then add the ground up spice mixture, ginger, and green chillies. After this is fried well, add the chicken pieces. Pour in about 2 cups of water, and add salt, put the lid on and allow the curry to simmer. Add the potatoes and cook covered. When the potatoes are cooked, blend in the coconut milk and yogurt. Bring up to a boil, then remove from heat. Serve hot, with cooked hot rice.

My next curry adventure will most likely be Butternut Squash Red Curry...hopefully, tomorrow night's dinner! Check back for the recipe.