Showing posts with label Vegetarian. Show all posts

Wednesday, August 27, 2014

Golden Beet Soup, with Goat Cheese and Braised Beet Greens

I first cooked with Golden Beets (or yellow beets?) last year when I saw them at our local Farmer's Market. This was a new food for me, they were tasty, and I was hooked. They taste less earthy than regular beets, but are just as delicious. Plus, the green tops are edible (and nutritious for the whole family, especially our primarily breastfed nine month old baby boy whose iron intake we've been careful to bolster through naturally iron-rich foods). So I got excited when I saw these special beets again this year, and couldn't wait to create something new with them! Last year, I learned that the beets taste amazing when paired with a little goat cheese, so I decided to explore that avenue some more.  This soup was very simply prepared but turned out well, and made enough to enjoy for lunch the next day (by which time it tasted even better).


Golden Beet Soup, with Goat Cheese and Braised Beet Greens

Serves 4 - 6

You will need:

3 big Golden Beets with green tops
1 tablespoon butter
pinch of nutmeg
1 medium onion, chopped
2 tablespoons olive oil,
1/2 teaspoon grated fresh ginger
5 cups chicken or vegetable broth
2 tablespoons lemon juice, plus zest of half a small lemon
Goat cheese - at least 4 tablespoons
salt and pepper to taste

Cut off the green tops about an inch from the base, wash well in cold water, dry, then chop into 1/2 inch strips and set aside.
Scrub grit off, then peel the beets. Cut off the top-part with the green stem remnants.  Dice the beets into 1/2 inch pieces and set aside.
Heat the olive oil in a soup pot on medium heat. Add the onions and let them soften and become translucent. Stir in the ginger, then add the beets, and broth. Bring up to a boil, stirring occasionally, then simmer covered for forty minutes or until beets are cooked through and break up easily with a fork.
While the soup is cooking, melt the butter in a small frying pan over medium heat. Add the beet green strips along with a pinch of nutmeg, and the lemon zest. The greens will release water and soften up in a couple of minutes, then remove from heat and set aside until serving.
Back to the soup - when the forty minutes have passed - check the salt, add pepper if desired. Add lemon juice. Give it a good stir. Then very carefully puree the soup using an immersion blender, or in small batches in a regular blender, until smooth. Reheat the soup before serving. Top each bowl with at least one tablespoon of crumbled goat cheese, and the reserved beet greens. Serve with crusty bread. Enjoy!

Note: I have also tried this soup with a splash of heavy cream stirred into the pot after pureeing. It adds a very rich taste, so go ahead and add it if you want that extra oomph. But it is unnecessary, the soup is just as velvety and tasty on its own.  


Thursday, July 31, 2014

Red Lentil Soup

Our little boy, now almost nine months old, loves lentils in all forms. We eat Dal (lentils simmered with Indian spices, typically served over rice or with breads) quite often here and, whenever we put some on his high chair tray, he eagerly reaches for it with his tiny little fists and tries to shovel it into his mouth as fast as possible.  So, yes, we think he either likes the flavors of Indian spices, or Dal itself.  Either way works for me, since lentils are cheap and said Indian flavors occupy a warm and cozy spot in my heart (which is great because I am Indian)!

This soup is inspired from Dal, but has a wonderful flavor which works even if you don't like Indian food, cooks up well in a big batch and is freezer-friendly. (In my experience, Dal, typically does not freeze well, so I was surprised when I discovered that this soup does - probably because it is already pretty broken down and pureed - read on.) I usually double the recipe and stash half in the freezer as soon as it has cooled, for a convenient dinner on a busy night. And why not? That just frees up more time for me to spend with chase after my little one!  


Red Lentil Soup


Red Lentil Soup

Serves 3 - 4

You will need:

1 cup split red lentils
2 tablespoons olive oil
1 onion, finely chopped
2 teaspoons finely chopped garlic (2 cloves)
1 teaspoon cumin powder
optional - 1/4 teaspoon red chili powder
pinch turmeric powder
1 tablespoon tomato paste
4 cups vegetable or chicken broth
1/2 cup water
salt and pepper to taste
1 tablespoon lime juice
Garnish:
2 tablespoons chopped fresh cilantro leaves
small pats of butter or olive oil to drizzle

Wash and rinse the lentils in several changes of cold water (at least three or four), discard all the rinse water and set lentils aside.
Heat oil in a big pot over medium heat, then add onion and garlic. Saute until translucent and edges of onion start to brown, about 4 or 5 minutes. Then add cumin, chili powder, and turmeric, stir for another minute.  Add tomato paste, broth, water, and lentils and stir well. Add salt and pepper to taste. Bring up to a boil, then simmer for at least 30 minutes with the lid mostly on (leave a gap for steam to escape), or until lentils are cooked through. Add lime juice and stir well. Then, with an immersion blender, or regular blender, puree the soup and keep warm until serving.
Serve garnished with cilantro and a pat of butter or a little olive oil drizzled on top if desired, with crusty bread and butter. Enjoy!
Note: this is a basic recipe, feel free to jazz it up with other veggies like carrots, celery, zucchini or, better yet, throw some crumbled bacon or browned sausage on top just before serving.

Friday, May 16, 2014

Inspired by Misticanza: Pasta with Ricotta and Wilted Garlicky Greens

I had never heard of "misticanza" until a few months ago while reading an article about springtime in Italy. Basically, "misticanza" is Italian for mixed wild herbs, generally tossed together in a salad. The word came across my mind again this week, creeping up on dinnertime, and all I could think was that I wanted to eat some greens. Like right now.

So, dinner was decided then. Rigatoni tossed with creamy ricotta, garlic sliced and fried just until golden brown, and whatever greens I could get my hands on (we only had arugula in the refrigerator so I used that) quickly wilted in that same pan with the remnants of the garlic oil, generously sprinkled with sea salt and freshly grated parmesan. To round out the dinner plate, I added a bruschetta, of sorts, that my husband and I love, with garlic, fresh tomatoes, basil, and a squeeze of lemon. Tasty. Simple. Wholesome.  

(And, until I actually go to Italy, hastily cobbled together yet delicious concoctions such as these are more than enough. For now.)


Rigatoni with Ricotta and Wilted Garlicky Greens

Serves 4

You will need:

Half a 12 oz. box of dried rigatoni (or any short pasta),
4 tablespoons ricotta
3 cloves garlic, thinly sliced
2 semi-packed cups greens (I used arugula)
1 Tablespoon + 1 teaspoon extra virgin olive oil
1/4 teaspoon freshly ground black pepper
sea salt - to taste
freshly grated parmesan - to taste

Cook pasta according to package directions, drain, and toss with 1 teaspoon of the oil. Set aside in a large serving bowl.
Heat remaining oil in a small frying pan on medium. Add the garlic slices, and fry just until golden brown (took about a minute on my stove). Then add the greens and let them wilt, this should take another minute. Add this, the ricotta, and pepper to the pasta and give it a good stir until the ricotta is well incorporated and it all comes together. Serve with sea salt and parmesan. Enjoy!

Note: if you have any of this leftover, it is better to eat it cold or at room temperature rather than heated. 

Monday, January 27, 2014

Butternut Squash and Apple Soup


You might ask, where have I been these past few months? I might say...having a baby. This blessed event occurred last November, but only now do i feel the fog of new motherhood lifting and am once again happy to resume experimentation in the kitchen. Content as I am to do little more than care for my precious baby boy, this foodie will go crazy if she does not get her kitchen zen in daily doses.

But back to this soup.

Despite a recent spike in unseasonably warm sunny days here in Seattle we're still enjoying various winter comforts, richly fulfilling squash soups being chief among them. This one has a few tart apples tossed in, giving it a nice lift in flavor. (Cooking with apples in savory uses is highly underrated, in my humble opinion.)


Butternut Squash and Apple Soup


This Butternut Squash and Apple Soup is simple to make with just a few ingredients, and has all the richness of a creamy soup without having any actual cream in it. (Two key factors to a new mother who enjoys food but has less time to devote to making it these days.) But it freezes like a dream, so make a big batch and let it feed you twice, or thrice. 


Butternut Squash and Apple Soup


Serves 4 - 6


You will need:


1 tablespoon extra virgin olive oil
1/2 cup finely chopped white or yellow onion
2 cloves garlic, minced
1/2 teaspoon allspice
optional - 1/2 teaspoon red chili powder
3 packed cups mashed roasted butternut squash (Note: I roasted a medium sized butternut squash and had 2 cups leftover. Use it to make risotto or red curry!)
3 small apples, cored and roughly chopped, with skin on
4 cups vegetable broth
pinch black pepper
salt to taste


Sauté onions and garlic in olive oil in a fairly large soup pot on medium heat. 


Add the spices and stir a minute or two, until the onions are well coated and fragrant. Add the apples and roasted squash, stir well. 


Add pepper and broth, bring up to a boil, then cover and let simmer for 30 minutes. Carefully puree the soup in batches in a food processor or using an immersion blender, then return to pan and let simmer until serving. Salt to taste. 


If you like, top the soup with a little greek yogurt or roasted butternut squash seeds. (Save the seeds, rinse off any fibers, pat dry, stir in a little butter and salt, spread on a baking sheet and roast at 350 for 10 minutes or until they start to "pop.") Serve with crusty bread, or just plain ole' buttered toast. Enjoy! 

Monday, September 16, 2013

Pears and Ricotta on Toasted Multigrain

This is my new happy mood breakfast. Or brunch. Or dinner. Or snack. It really just makes me smile!

Pears and Ricotta on Toasted Multigrain

Easy as pie, and tastes sort of like it too. There's really no exact recipe. And feel free to use any kind of fruit; I only used pears since it's the season and we were blessed with quite a few this year. But here's what you do. Mix up some ricotta, with a bit of lemon zest and fresh grated ginger and refrigerate until ready to use. Slice up some pears and caramelize them in a bit of butter, cinnamon, and brown sugar. Slice up some multigrain bread (or any bread), and toast it. Spread with ricotta, top with the sliced pears and then, if you like, drizzle some of the pan butter on top.

Brunch. Or Dinner!

The only thing left to do is to eat it all up immediately. Just as we have, in our house, four times in the last week. Enjoy!

Monday, July 1, 2013

Yellow Beets, & Yellow Beet Risotto

I found some bright, delicious-looking organic Yellow Beets at the farmer's market on Saturday. Gorgeous, huh?  I've been in a risotto sort of mood lately, so, despite the 90-degree weather Seattle has been experiencing this week, I decided to turn on the stove and make a yellow beet risotto.

Yellow Beet Risotto

Boy, am I glad I did. I used my basic risotto recipe, using red onion instead of white and skipping the garlic and wine (you don't need them here!), and substituted the yellow beets plus their chopped up greens in place of whatever veggies I would normally use. A splash of balsamic vinegar, and a sprinkling of goat cheese added the final touches and kicked it up a notch! It was the perfect dinner on a warm summer evening. It tasted like summer, and was just oh-so-yummy!


Yellow beets - I will definitely be cooking with you again.  

Thursday, June 13, 2013

Red Russian Kale, oh the possibilities!

I planted a new variety of kale in my little garden this year. Red Kale. Red Russian Kale, to be exact. It is much more tender and delicate than the Dwarf Blue variety we planted for the second time this year. I had only planted one row, as I do with most new seeds but, after having cooked a few meals with it this week, I am so happy with the results and am kicking myself for not having more available right now!

Red Russian Kale Omelet

With that said, I am savoring every bite of what we have available to harvest now...we put it on grits for dinner the other night, alongside caramelized onions, and a fried egg on top. And, filled it into omelets for breakfast this morning with roasted garlic, a bit of thyme, and shaved asiago cheese. Tasty.

Red Russian Kale
This Red Russian variety - according to my research - tends to develop more flavor after frost (and freezes well, as all Kale does), so I think I will plant a few more rows in mid-to-late summer so we can continue savoring this tasty green treat through the winter months.

Friday, May 10, 2013

Farmers Market Opening & Potato Leek Soup

Our local farmers market opened for the season last weekend. We were there bright and early, sporting reusable totes and big smiles on our faces. The weather could not have been better, sunny and in the upper seventies, and lucky us since this is atypical for our area in early May. We wandered around with our friends, took in the sights, smells, sounds, colors, fed the Alpacas and returned home armed with plump happy fruits and veggies for the week including the freshest, biggest bunch of Leeks one could find (for $2!).

We whipped up this rustic, comforting, potato leek soup that same day and savored dinner out on the back porch enjoying those last few moments of warmth just before the sun went down.

Potato Leek Soup
Serves 4-6

You will need:

3 Tbsp butter + 1 Tbsp olive oil
3 good sized leeks, chopped up (use only the whites and light green portion)
4 smallish Yukon gold potatoes cubed (we leave the skin on)
5 cups chicken or veggie stock
1 bayleaf
freshly cracked black pepper – optional

Add butter and oil to a heavy bottomed pot and let butter melt over low heat. Stir in the leeks. Cover and cook on low for about 10-12 minutes, stirring every once in a while to prevent the leeks from burning (trust me it’s easy to burn them, been there done that). Add bayleaf, potatoes, and veggie stock, bring to a boil then cook on low for 10-12 minutes or until potatoes are done. Toss out the bayleaf. The soup is ready; it may be slightly thin right now, but it will thicken up and get a gorgeous velvety texture as it sits and the potatoes start to disintegrate even more (this recipe makes a ton for just two so your leftovers the next day will be awesome!). But I also think that is part of the rustic appeal of this soup.
Serve soup hot topped with freshly cracked black pepper if you like, with good fresh bread. Enjoy!

Sunday, April 28, 2013

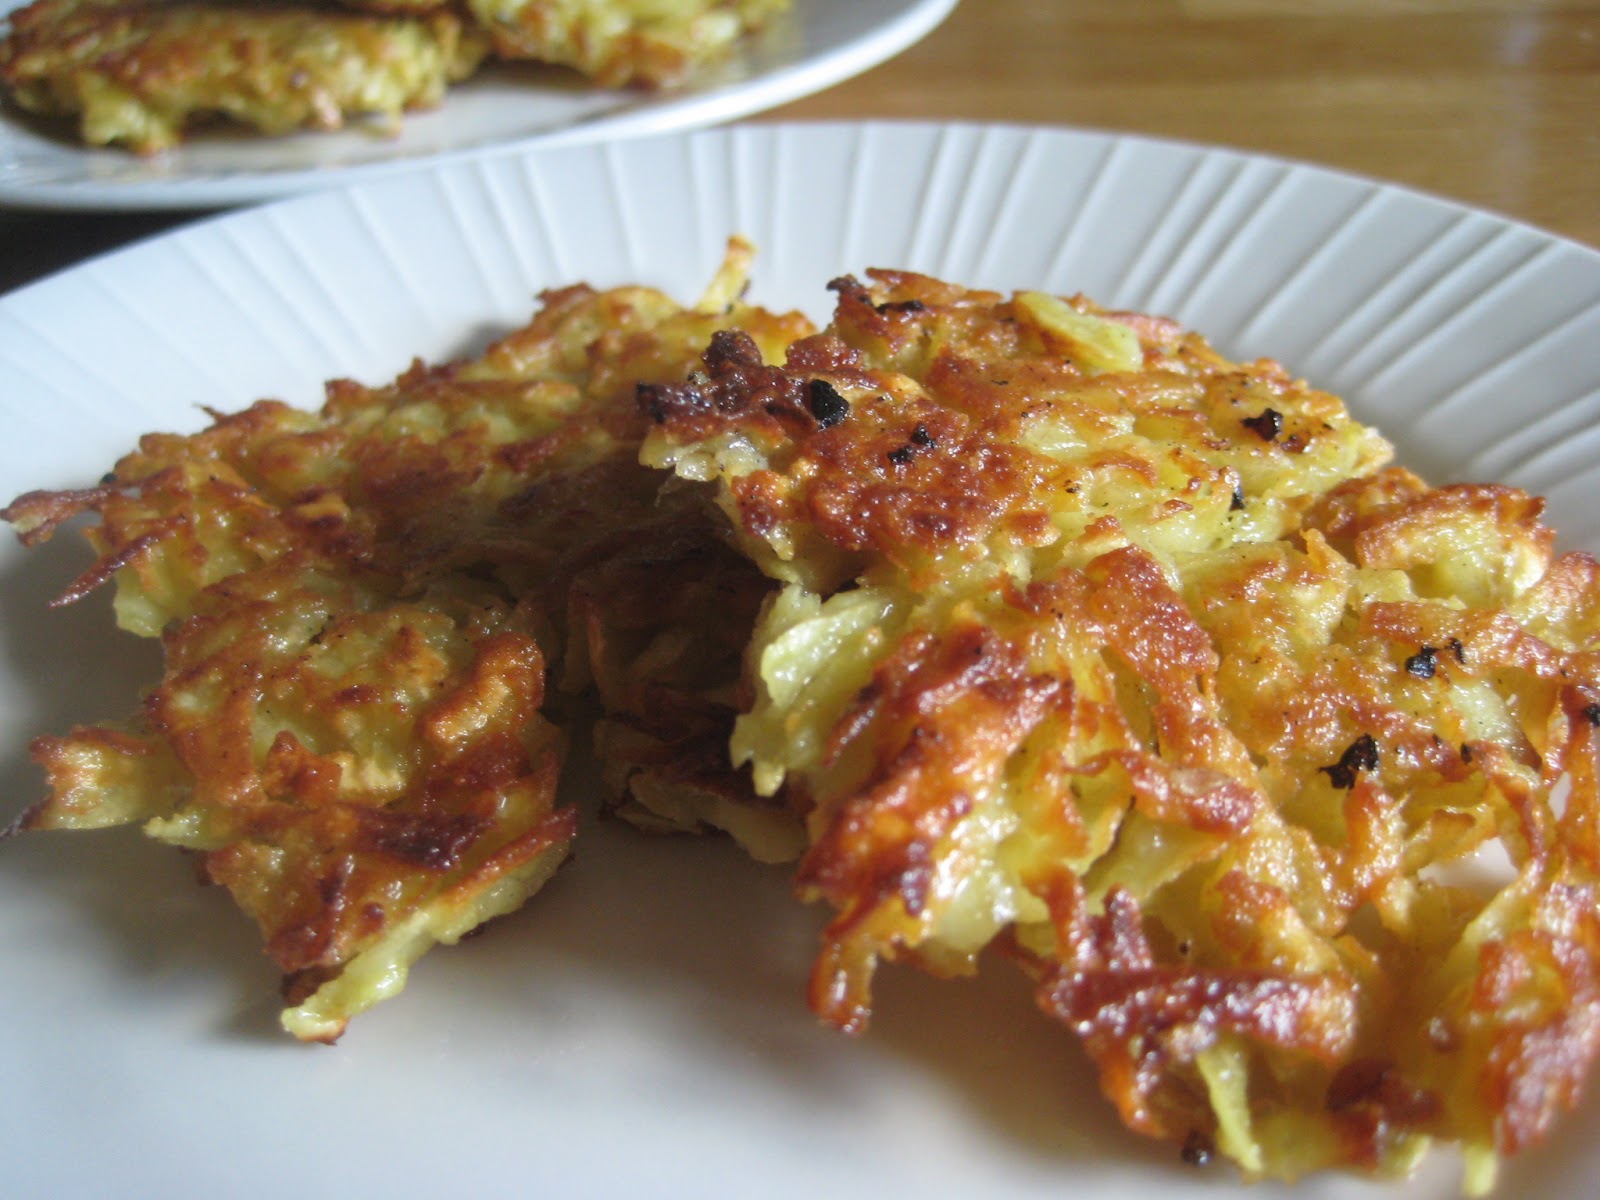
Sweet Potato Latkes


I love latkes. Regular potato latkes. I have also never met a sweet potato we didn’t like. Stay with me, I have a point.

All of a sudden, a craving for crispy potatoes hit. Easily fixed. A quick glance in the pantry confirmed only one small lonesome Yukon Gold potato, BUT…an ample supply of plump sweet potatoes. So...Sweet Potato Latkes here we come!

The following isn’t so much a recipe, as a suggestion of directions. The key is to squeeze all moisture from the grated sweet potatoes, otherwise they will not crisp up and turn golden brown as beautifully as they should. Other ingredients you might include with two grated sweet potatoes: ¼ cup finely chopped onion, scant 1/3 cup all purpose flour, 2 eggs, salt and pepper, and of course some oil and a cast iron skillet for frying.

Peel. Grate. Squeeze. Mix. Fry. Eat.


Sweet Potato Latkes

I like that this dish is not as heavy as sweet potato casserole or as greasy as fries. Rather, they end up some happy place in between. And fairly light if you only eat one or two – which may be challenging given how tasty they are! Plus, they just look special and different. Perhaps fancy enough for an appetizer, or to add a crisp element to a meal if you need that. Enjoy!

Wishing everyone a beautiful Spring.

Friday, November 9, 2012

Black Bean Tortilla Soup...in a Crock Pot!

I recently met a few people who do not own slow cookers or crock pots. How can this be? If you are one of those people, I highly recommend getting one. In fact, ask for a crock pot this next Christmas. I inherited mine from my mother-in-law. It’s a circa 1970s original Rival "crock pot" that weighs about as much as I do, and I absolutely love it. It is an integral part of my kitchen, and gets heavy use in the fall and winter months. Combine this genius little invention with a delicious soup recipe and I’m all set. This black bean tortilla soup is not only nutritious, delicious, so easy to make in a slow cooker, and cheap, it’s also completely vegetarian – actually vegan! (Well…beans have other “benefits”, of course.) Talk about your healthy comforts.

Black Bean Tortilla Soup

You will need:
1.5 cups dried black beans, soaked overnight
1.5 cups of any combination of finely chopped onions, bell peppers, celery, carrots, etc.
1 can diced tomatoes, juice and all
1-2 cloves garlic, finely minced
1 tbsp of bottled chipotle sauce
½ tsp cumin powder
6-7 cups of veggie stock
1 tbsp of olive oil
Optional – salt if needed (we skipped)

Toss everything into your slow cooker / crock pot, cover, turn on “low”. Then walk away. (Or go to work!) Come back after 9-10 hours. It should be ready to eat and delicious. Give it a good stir before serving. Optional - top with tortilla chips, cilantro, and/or avocado. We did all three and it was fabulous. Enjoy!

P.S.: you can also cook on “high” for 4 hours, then “low” for 2 hours.

Wednesday, October 10, 2012

Pumpkin Dumplings

Last Saturday, we visited this farm. They have all the lovely Fall-type activities including a big pumpkin patch, gigantic corn maze, apple orchard, and a petting zoo (for the child inside all of us). Bonus you get a stunning view of snow-capped Mount Baker towering in the horizon. So this is one of my new favorite places to visit seasonally in the state of Washington. We came away from the crisp autumn afternoon warmed with fresh hot apple cider, happily hugging our stash of fresh picked apples and pumpkins that will probably feed us until next year.

I have a love affair with pumpkins. I know I've shared some favorite pumpkin recipes before, but now I have a new one to add to the list, pumpkin dumplings! (By the way, the secret reason for all this experimentation is to get my husband to eat pumpkin in various forms, so I can continue to cook it. He hates pumpkin pie with a passion. I know, he's crazy right?) 

So, pumpkin dumplings...here we go! If you're a fan of pretty much anything mixed with pasta sauce, you'll love this.  This sort of looks and tastes like gnocchi, except it tastes a bit like pumpkin too. Making it is as easy as can be.


Pumpkin Dumplings

This portion serves 8, which makes about the equivalent of cooking up an entire box of pasta.

You will need:

2 eggs
2 cups pure pumpkin (pureed with a little water if its too firm)
3 1/4 cups flour
pinch of nutmeg

Mix everything together in a large bowl until well incorporated. I like my large spatula and wooden spoon for this. The dough will be sticky, that's okay. Bring a big pot of water to a boil, add salt when boiling, and drop the dumplings one teaspoon at a time into the boiling water. Let them rise to the surface and cook another minute like that. Should take about 2-3 minutes total. Scoop out with a slotted spoon when done. When all dumplings are cooked, you're all set. But, when you're ready to eat them, sauté them up with a teensy bit of olive oil and butter, mix with any kind of green leafy veggies that you like, top with plenty of freshly cracked black pepper, freshly grated parmesan, and serve hot. Enjoy!


Tuesday, October 2, 2012

Portobello Mushrooms, Stuffed with Goat Cheese and Kale

Portobello mushrooms. Those things that are as meaty and delicious as steak, without actually being steak. We love Portobello mushrooms but at our place they must be reserved as special treats since they cost a pretty penny. Their size makes them a perfect little appetizer, first course, or light dinner. This method is fancy looking, yet easy to make.


With all that said, these should not be cooked any old way either. They must be fussed over and treated like the kings and queens they are.  (Do not stomp them into a casserole, that’s what plain ole button mushrooms are for!) We like keeping it simple. For dinner last night, we stuffed these beauties with a little goat cheese, chopped up kale (fresh from the garden out back), plenty of freshly cracked black pepper, an assortment of herbs, and one egg to bind it all together.

Portobello Mushrooms, Stuffed with Goat Cheese and Kale

Pile the mixture high into the mushrooms, lay on a foil lined cookie sheet, and bake at 400 F for about 15 minutes, or until the kale starts to crisp up and turn golden-brown. Done. My husband called it “wow”.  (And he never says wow.) Enjoy!

Sunday, February 19, 2012

Kale Chips

My first attempt at homemade Kale Chips. Inspired by my friend Jennifer, at whose home recently I had the most wonderful Kale Chips, I decided to try making these. And...success! Why didn't anyone tell me how easy these are to make at home?? Not to mention, I would venture to guess that munching on homemade oven-baked Kale Chips is any day better for you than munching on fried things.


   Kale Chips


I started with a beautiful bunch of organic Purple Kale. Simply wash, rinse, rip into bite sized pieces, dry (this is where a salad-spinner is a huge help!), then toss with a bit of olive oil, salt and pepper, and bake on a cookie sheet at 350 F for 10-15 minutes. Results: crispy, yummy, wonderful green goodness. Enjoy!


Thursday, February 9, 2012

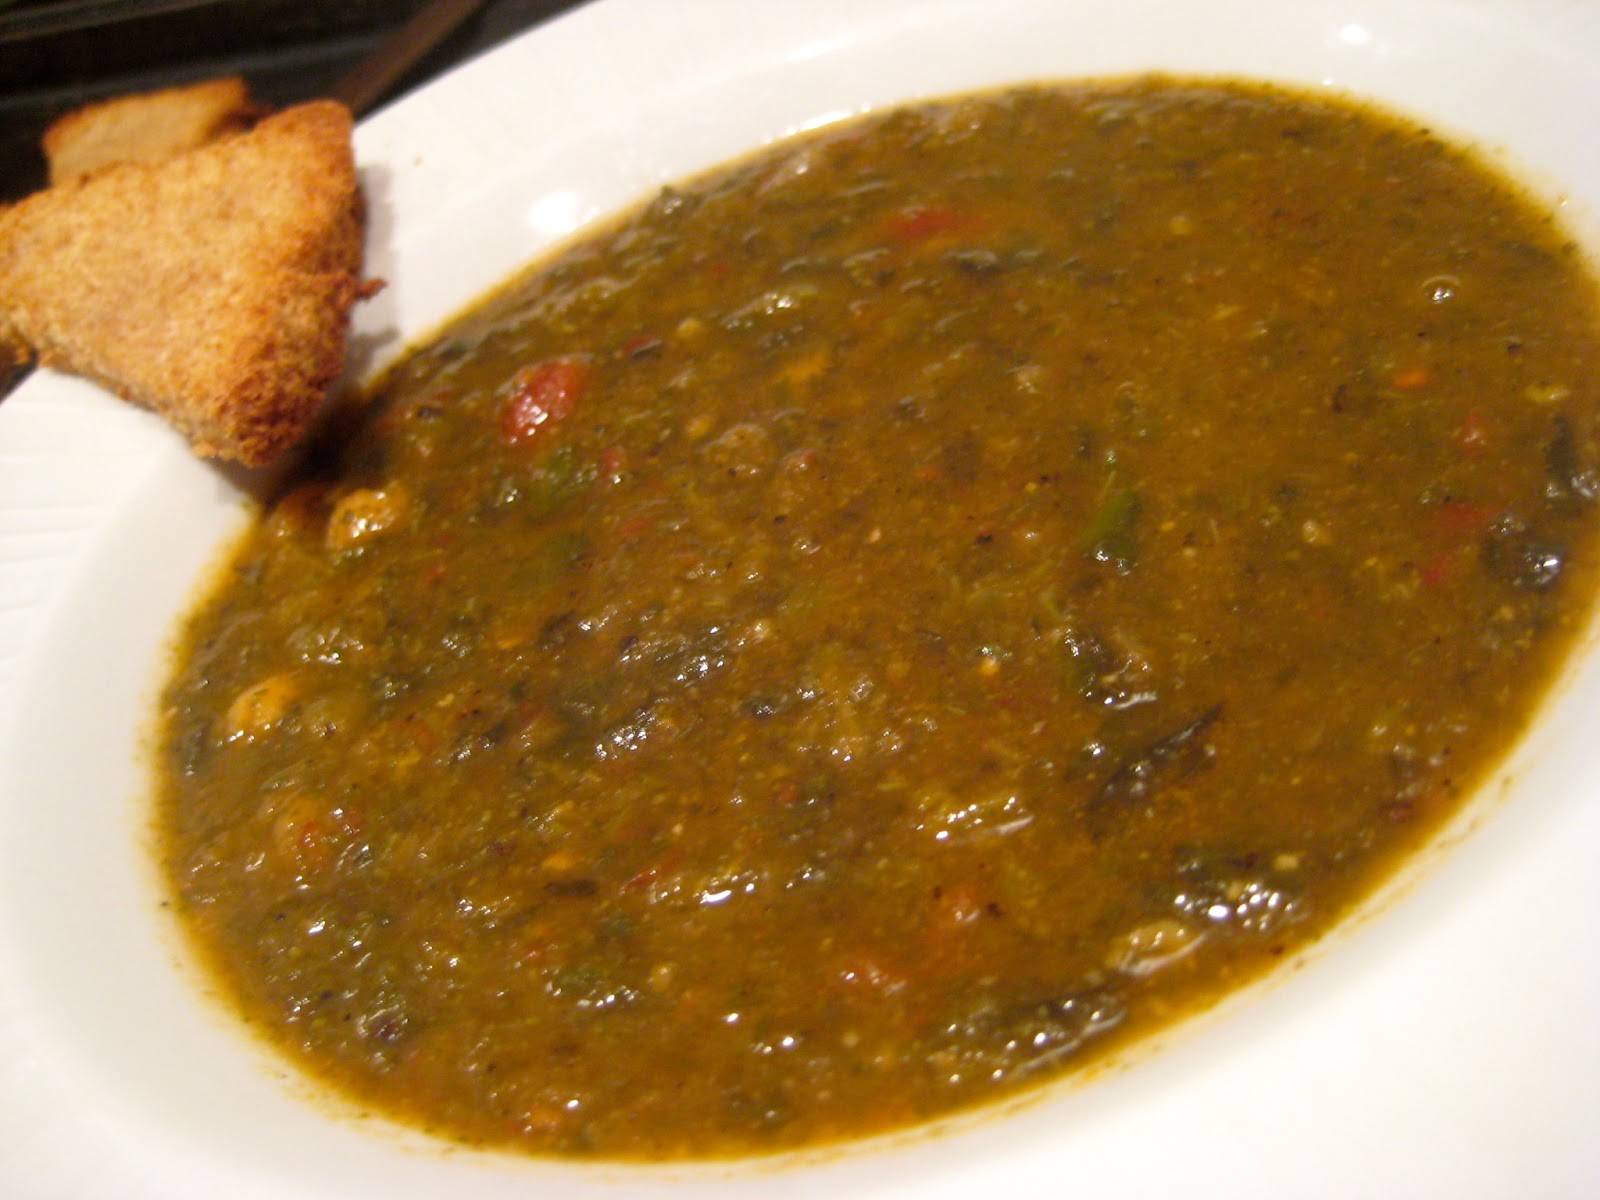
Spiced Chick Pea Soup

Chick peas, spinach, and tomatoes simmered in savory herbs and spices, with homemade garlicky crostini...dinner is served! This soup is perfect on a cold winter's evening, and very hearty for being completely vegetarian. Quick and easy to make, and, you will have plenty leftover for tomorrow's lunch!


Spiced Chick Pea, Spinach, and Tomato Soup


You will need:

2 tablespoons olive oil
1/4 cup chopped red onion
2 cloves garlic, finely minced
1 bay leaf
1/2 teaspoon cumin powder
1/2 teaspoon dried parsley
1/2 teaspoon dried oregano
3 tablespoons harissa (a versatile condiment well worth having on hand!)
1/2 teaspoon black pepper
salt to taste (I did not need to add any)
1 can chick peas (garbanzo beans), rinsed really well and drained
1 package frozen chopped spinach, thawed and squeezed of all water
1 can fire roasted tomatoes (regular diced tomatoes are fine too)
4 cups vegetable broth, warmed

Heat up the olive oil in a soup pot on medium heat. Add onions, garlic, and saute for a couple of minutes on medium heat. Then add the bay leaf, cumin powder, and dried herbs. Stir for a minute, then add the harissa paste and stir for another minute. Add pepper (and salt if you like), chick peas. spinach, and tomatoes with their can liquid as well. Stir well for two minutes. Add the warmed vegetable broth and bring the soup to a boil. Once boiling, lower heat to a strong simmer and leave uncovered for 30 minutes. Fish out the bay leaf. At this point the soup is ready to serve!
Or, you could remove half the soup, puree it in the food processor or with an immersion blender, then add it back into the remaining soup - this gives it a wonderful thick consistency and the textures play off each other really well!
Toss in some croutons or any kind of bread when serving. Enjoy!

Tuesday, January 17, 2012

Bibimbap

We had some friends over the other night. They were kind enough to help us stack boxes to get ready for the upcoming move. (And, yes, we are moving again - but more on that later.) The evening's other activities included a rousing time of dance central - so much fun - and a healthy veggie-packed dinner (it seemed like a good idea, beyond just the fact that it is still early in the new year and none of us are bored with our resolutions. Yet :)  For dinner, I decided to attempt Bibimbap with a veggie/vegan spin.

In case you are wondering, Bibimbap is not just a funny word, it is a wonderful Korean dish that involves sautéed veggies and/or beef served over rice, usually accompanied by a fried egg on top. I have eaten it at restaurants, but hadn't yet attempted to make it at home. Also, in case you are wondering, it is pronounced "bee-bim-bahp"...in Korean this means "leftovers" or "mixed with rice" as Wikipedia so helpfully informed me.

What I love best about this dish is that you can use any vegetables you have on hand! I started with this very easy recipe from Serious Eats, and modified it to exclude the zucchini and daikon radish since I had neither on hand. I made the rice pancake as directed, but for the veggies I used only spinach, bean sprouts, carrots, and sliced shitake mushrooms. I sautéed the spinach and sprouts separately in sesame oil and red pepper flakes, then the carrots in sesame oil and a little honey, and then the mushrooms in sesame oil and soy sauce. Sprinkle sesame seeds on top if you wish.


Bibimbap


It turned out pretty well! We ate ours with a little soy sauce and sriracha. Yum! I like veering from the authentic versions to skip the meat. But next time I will definitely add a fried egg on top. That would make it a bit more authentic. And, let's be honest, I will eat just about anything with a fried egg on top. Enjoy!

Thursday, October 6, 2011

Curried Cauliflower Soup

Seven more months of rain?  I have a feeling we're going to be having SOUP for dinner quite a bit!  This is another easy one worth trying, a good comforting soup for rainy and cold evenings.  This recipe makes a big batch, so if you are cooking for just two there will be plenty left over for the next day's lunch.  Try it!

Curried Cauliflower Soup


Serves six to eight.

You will need:

1 whole cauliflower, cut into florets
1 small white or red onion roughly chopped
3-4 cloves garlic
1 tablespoon minced fresh ginger
5 cups vegetable broth
1 (14 ounce) can coconut milk (light is fine)
1 tablespoon yellow or red curry paste
1 pinch turmeric
1/4 teaspoon coriander powder
2 tablespoons vegetable oil
optional - salt to taste (if broth is unsalted)
optional - fresh cilantro for garnish

Saute onions and garlic in the oil in a large pan on medium heat, until softened, about 4-5 minutes. Add the cauliflower and continue to cook on  medium heat until florets are halfway cooked, about 4 minutes, adding a little of the vegetable broth if necessary to keep the vegetables from sticking to the bottom of the pan. Add curry paste, turmeric, and coriander powder and stir well. Then add all the vegetable broth, coconut milk and bring to a boil. Then reduce heat to low, cover, and simmer for 15 minutes. Puree the soup (carefully) in a blender in batches or with a stick blender. Simmer before serving. Serve warm, topped with a little fresh cilantro if desired. Enjoy!

Monday, October 3, 2011

Easy Lemony Tortellini Soup

I don’t care if you say you can't cook, or say you don’t have time....ANYONE can boil water! Which is all this soup entails. This is an easy to make, great alternative to chicken noodle soup, perfectly comforting for these cozy Fall evenings. As a bonus, this uses the most interesting pasta ever - Tortellini! Easy to put together at the last minute for lunch or dinner. Seriously….try this:


Easy Lemony Tortellini Soup


Serves four.


You will need:
4 cups vegetable or chicken broth
1 pkg dried tortellini (3 serving pack, you will find it in the pasta aisle in grocery stores) cooked per package instructions
1 tablespoon lemon juice
1 tablespoon chopped fresh parsley
1/2 teaspoon freshly cracked black pepper
optional - salt (skip if broth already contains salt)
optional - 1 teaspoon lemon zest (this gives the soup amazing flavor!)
 
Heat the stock to a boil and add cooked tortellini. Stir in lemon juice (and optional lemon zest). Divide equally among four soup bowls, top with parsley, and pepper. Serve immediately, with an extra lemon wedge if desired. Enjoy!

Wednesday, September 14, 2011

Samosas

Samosas are probably the most delicious Indian snack, ever. At least, according to a lot of people I know. And samosas are the most requested Indian dish in my circle of friends. Seriously, even people who don't like Indian food will eat these delicious little deep fried savory treats.

There are literally hundreds of different ways to make the samosa filling, depending on where you grew up or who you ask, but here's a simple recipe that I have been making for years and has become very popular with friends. This filling is an all veggie option, and is really tasty with just the right amount of spice and tangyness. The pastry is just about perfect too. (If you don't want to go to the trouble of making the pastry at home, a couple of shortcuts are wonton skins or frozen puff pastry. Both are easy substitutes and cut your prep/cooking time significantly.) Whether you choose the shortcut methods or the original, prep is still labor intensive so make sure you have plenty of time before getting started. Hope you enjoy this recipe!

Samosas


For the samosa filling, you will need:

2 Tablespoons vegetable oil
1/2 teaspoon cumin seeds
1/2 teaspoon mustard seeds
2/3 cup finely chopped onion
2 Tablespoon chopped fresh cilantro
1 Tablespoon dried mango powder, or 2 Tablespoons lemon juice
1 teaspoon cumin powder
1 teaspoon coriander powder
1 teaspoon salt
1 teaspoon red chilli powder
5 medium potatoes, peeled, cut into 1/2" pieces and boiled for 15 minutes
1/4 cup peas (optional)

Heat the oil in a large skillet on medium heat. When oil is hot, add the cumin seeds and mustard seeds. When the seeds pop, add onion, and cilantro. Sauté until the onion becomes translucent, about 3-4 minutes, then add dried mango powder or lemon juice, cumin and coriander powder, salt, and red chilli powder. Sauté a few minutes just until the spices have cooked a bit, then add the cooked and drained potatoes, and the optional peas. Mix well and sauté just until heated through, them remove from heat and set aside.

To make the samosa pastry, you will need:

2 cups plus 2 tablespoons all purpose flour
2 1/2 Tablespoons vegetable oil
1/2 teaspoon salt
Water

Mix the flour, oil and salt in a mixing bowl, then add water gradually (about 1/4 cup at a time) until the dough holds together, and knead well. Roll into a ball and cover with a damp paper towel. Let this dough rest for about 20 minutes. Then, break off walnut sized balls of the dough, and roll out into 5-6" circles. Cut each circle in half. Fold each half-circle to form a cone. Fill the cone with about a spoonful of the potato mixture. Press the samosa between your palms to remove air pockets. Moisten the edges with some water, and seal.

Deep fry the samosas in a lot of oil (at least 2" deep) until golden brown, turning twice; drain. Serve hot plain or with your choice of chutney (sour chutneys are best), or preferred dipping sauce. Enjoy!

Monday, August 29, 2011

Green Goodness Smoothie

Drinkable green goodness. It's is my new favorite breakfast. This yummy smoothie (or juice?) is extremely filling and gives me a solid portion of my required daily dose of fruits and veggies, and it's fresh, cold, and delicious! I can already hear the mental "eww", but try it before passing judgement  :)

Green Goodness Smoothie


You will need:
1 granny smith or golden delicious apple, cored (but not peeled)
2 cups fresh spinach leaves
1/3 cup orange juice
1 teaspoon honey
2 or 3 ice cubes
optional - 3-4 mint leaves (adds cool refreshing flavor!)

Blend all ingredients. Pour into glass. Enjoy!

Monday, August 22, 2011

Blueberries and Cornbread. Who knew?

I needed to come up with some sort of salad to contribute to a Barbeque with friends last week. As it so happened, I had plenty of fresh blueberries on hand so a blueberry salad wasn't far from my thoughts.  Actually, I was thinking more of a blueberry and cornbread type of dish. I've had perfectly good blueberry cornbread muffins before, so...why the heck not?!?  So, I experimented with it, a whole thirty to forty-five minutes before our dinner (which, of course, left plenty of room to run and grab a bag of chips should this epic experimental dish have completely failed.)

But, I put it together and found it to be scrumptious.  It is much less of a salad, and in fact, practically dessert.  Don't cringe at the list of ingredients. Trust me, it truly is a delicious combination of things. The group agreed...as there was hardly any evidence to bring home. So, here you go!


Blueberry Cornbread Salad


You will need:

One 8x8" pan's worth of cornbread, cubed (crumbled is fine too)
1 pint of blueberries
2/3 cup whole roasted cashews (or hazelnuts, if you prefer)
1/4 teaspoon paprika
1/4 teaspoon black pepper
1/4 teaspoon salt
2 tablespoons olive oil
2 tablespoons lemon juice

Mix all together - yes, trust me. Serve immediately. Enjoy!