Friday, November 9, 2012

Black Bean Tortilla Soup...in a Crock Pot!

I recently met a few people who do not own slow cookers or crock pots. How can this be? If you are one of those people, I highly recommend getting one. In fact, ask for a crock pot this next Christmas. I inherited mine from my mother-in-law. It’s a circa 1970s original Rival "crock pot" that weighs about as much as I do, and I absolutely love it. It is an integral part of my kitchen, and gets heavy use in the fall and winter months. Combine this genius little invention with a delicious soup recipe and I’m all set. This black bean tortilla soup is not only nutritious, delicious, so easy to make in a slow cooker, and cheap, it’s also completely vegetarian – actually vegan! (Well…beans have other “benefits”, of course.) Talk about your healthy comforts.

Black Bean Tortilla Soup

You will need:
1.5 cups dried black beans, soaked overnight
1.5 cups of any combination of finely chopped onions, bell peppers, celery, carrots, etc.
1 can diced tomatoes, juice and all
1-2 cloves garlic, finely minced
1 tbsp of bottled chipotle sauce
½ tsp cumin powder
6-7 cups of veggie stock
1 tbsp of olive oil
Optional – salt if needed (we skipped)

Toss everything into your slow cooker / crock pot, cover, turn on “low”. Then walk away. (Or go to work!) Come back after 9-10 hours. It should be ready to eat and delicious. Give it a good stir before serving. Optional - top with tortilla chips, cilantro, and/or avocado. We did all three and it was fabulous. Enjoy!

P.S.: you can also cook on “high” for 4 hours, then “low” for 2 hours.

Wednesday, October 31, 2012

Happy Halloween!

Happy Halloween, all!  Aren't these little owl cupcakes cute? 


Have a safe evening out there!

Wednesday, October 10, 2012

Pumpkin Dumplings

Last Saturday, we visited this farm. They have all the lovely Fall-type activities including a big pumpkin patch, gigantic corn maze, apple orchard, and a petting zoo (for the child inside all of us). Bonus you get a stunning view of snow-capped Mount Baker towering in the horizon. So this is one of my new favorite places to visit seasonally in the state of Washington. We came away from the crisp autumn afternoon warmed with fresh hot apple cider, happily hugging our stash of fresh picked apples and pumpkins that will probably feed us until next year.

I have a love affair with pumpkins. I know I've shared some favorite pumpkin recipes before, but now I have a new one to add to the list, pumpkin dumplings! (By the way, the secret reason for all this experimentation is to get my husband to eat pumpkin in various forms, so I can continue to cook it. He hates pumpkin pie with a passion. I know, he's crazy right?) 

So, pumpkin dumplings...here we go! If you're a fan of pretty much anything mixed with pasta sauce, you'll love this.  This sort of looks and tastes like gnocchi, except it tastes a bit like pumpkin too. Making it is as easy as can be.


Pumpkin Dumplings

This portion serves 8, which makes about the equivalent of cooking up an entire box of pasta.

You will need:

2 eggs
2 cups pure pumpkin (pureed with a little water if its too firm)
3 1/4 cups flour
pinch of nutmeg

Mix everything together in a large bowl until well incorporated. I like my large spatula and wooden spoon for this. The dough will be sticky, that's okay. Bring a big pot of water to a boil, add salt when boiling, and drop the dumplings one teaspoon at a time into the boiling water. Let them rise to the surface and cook another minute like that. Should take about 2-3 minutes total. Scoop out with a slotted spoon when done. When all dumplings are cooked, you're all set. But, when you're ready to eat them, sauté them up with a teensy bit of olive oil and butter, mix with any kind of green leafy veggies that you like, top with plenty of freshly cracked black pepper, freshly grated parmesan, and serve hot. Enjoy!


Tuesday, October 2, 2012

Portobello Mushrooms, Stuffed with Goat Cheese and Kale

Portobello mushrooms. Those things that are as meaty and delicious as steak, without actually being steak. We love Portobello mushrooms but at our place they must be reserved as special treats since they cost a pretty penny. Their size makes them a perfect little appetizer, first course, or light dinner. This method is fancy looking, yet easy to make.


With all that said, these should not be cooked any old way either. They must be fussed over and treated like the kings and queens they are.  (Do not stomp them into a casserole, that’s what plain ole button mushrooms are for!) We like keeping it simple. For dinner last night, we stuffed these beauties with a little goat cheese, chopped up kale (fresh from the garden out back), plenty of freshly cracked black pepper, an assortment of herbs, and one egg to bind it all together.

Portobello Mushrooms, Stuffed with Goat Cheese and Kale

Pile the mixture high into the mushrooms, lay on a foil lined cookie sheet, and bake at 400 F for about 15 minutes, or until the kale starts to crisp up and turn golden-brown. Done. My husband called it “wow”.  (And he never says wow.) Enjoy!

Monday, September 24, 2012

Ridiculously Easy Homemade Granola

I have never made granola at home before. Not having anything available for a quick grab-n-go breakfast tomorrow, I found a basic homemade granola recipe and decided to give it a whirl. And now that I've tried it, I think granola immediately needs to go on the list of things NEVER to buy at the store ever again. It's not that you typically think of granola as "pricey", the fact is it takes less than five minutes of prep time at home, AND, it's cheaper so....why the heck not? All you need are some rolled oats, and whatever else you want to eat in your granola.


This is ridiculously easy homemade granola. And, when I say it took me less than five minutes to put together it's the truth - this includes the time it took to gather the ingredients and wash the mixing bowl. (And it makes your house smell like cookies.) You have to try it.

Makes about 6 cups

Step 1. Add to a mixing bowl:
5 cups of old fashioned rolled oats
1/4 cup honey and 1/4 cup brown sugar
1/2 cup canola oil
1 teaspoon real vanilla extract
1/2 teaspoon salt
1/4 teaspoon cinnamon
...and any combination of 1/2 cup sweetened coconut flakes, 1/4 dried fruit, 1/4 cup pecans (or walnuts or anything else your tummy desires). I kept my version to whatever I had available, i.e. coconut flakes and pecans.


Step 2. Mix well.


Step 3.  Spread onto cookie sheets and bake at 300 F for 5 minutes, stir, then bake an additional 7 minutes. Cool completely and store in airtight containers. 


Ridiculously easy, right? Enjoy!

Wednesday, August 8, 2012

Kale Harvest


I bought a package of Kale seeds and planted some, even though it was not in the plan for my little veggie garden this year. I was hesitant, never having planted kale before, but figured it would be worth the try since we've been eating more and more of it lately. I planted roughly a 1'x2' area and it grew so well, and so abundantly and thickly that this harvest here is only about one-fifth of what remains. I may need a bigger salad spinner. Yippee!


If you have even the tiniest patch of dirt I encourage you to plant some Kale. It's very good for you (I'm no expert on the details of that!) and it was so easy to grow. Plus, you could buy a package of organic kale seeds for less than $2, and probably get pounds and pounds of kale out of it versus spending $2 or $3 for a single bunch at your local grocery store or farmer's market. Do it!

Saturday, July 14, 2012

Saturday, July 7, 2012

Salmonberry Salad

The simple joys.  Picking delicate baby greens from the garden.  Tossing in bright ripe salmonberries picked mere minutes ago.  Dotting with olive oil, and freshly cracked black pepper.


The result: a simple, joyful salmonberry salad.  Happy Saturday, everyone!


Friday, June 22, 2012

Foraging: Salmonberries!

foraging:  the acquisition of food by hunting, fishing, or the gathering of plant matter.


I've been reading about foraging lately.  It's a new love.  So far our foraging has been limited to picking berries. Still, a whole new world of food possibilities has opened up!  And it's all free, that F word I really love.  Last year we picked blackberries.  This year, we have a new find:  salmonberries.

The salmonberry is another edible fruit native to the state of Washington.  The seem perfectly good to eat plain when ripe, or cooked up.  We made Salmonberry Tarts two weeks ago.  Last week we ate them in crêpes for breakfast.  Naturally sweet, a bit tart, full of good fruity yummyness.


Salmonberry Crêpes


Oh yes, sweet little salmonberries, we will be back to pick more of you in the coming weeks, before you disappear.  Until next June! 


Tuesday, May 1, 2012

Wild Mint Growing In Our Backyard!

We stumbled upon several wild mint plants while strolling through our back yard over the weekend. There it was, happily growing out of the compost pile that the previous homeowners had left behind in a corner of our backyard. Fresh mint...in our own backyard. That's RIGHT! And in case you didn't catch what excites me most about this discovery - it is FREE. Yippee! I was already daydreaming about fresh mint tea with when two things occurred to me. First, that I had just depressed myself not even one week ago because mint was the only herb I had not started indoors or bought. Second, this little baby is going to come back next year and every year after that. I couldn't help but wonder, was the timing of this just a coincidence? God's gifts are truly wonderful. Even the tiny little "minty" ones, wouldn't you agree?


Anyway, the inaugural concoction using our unexpected gift from the ground:  fresh mint tea. Simple, fragrant, and warms the bones. I love it. For one serving, add 8 - 10 oz boiling water to 1 scant teaspoon green (or jasmine) tea leaves, and drop in a couple teaspoons worth of mint leaves lightly bruised between your fingers. Let steep for as many minutes as it suits you. Oh-so-good. Enjoy!


Now doesn't this look very warming? So. What will we do next with our minty bounty?  Maybe Mojitos!

Wednesday, April 18, 2012

Brie Pear and Bacon Sandwich

In honor of tax day, last night we had Pork for dinner.  (What....is that funny?)  Paying taxes, not so fun. Bacon on the other hand, SO much fun!  An easy yet slightly fancy take on the classic regular grilled cheese sandwich (of which we are big fans).

Brie Pear and Bacon Sandwich


Ultra easy to make:  put some brie, sliced pear, and a strip of bacon between two slices of bread. Butter the outsides, and toast it up in a skillet to golden-brown goodness. Enjoy!

Sunday, April 8, 2012

Who says Easter Eggs are just for kids?

So, who says Easter Eggs are just for kids?  Here I am, walking proof that there is plenty of fun to be had for a twenty-something adult with colored eggs.  Oh yeah.  This being my first time ever dying easter eggs, I went with a pretty range of cool greens and blues.  I think my favorite is the robin's egg blue....it reminds me of a special little box from Tiffany's (hint to the husband :)


Happy Easter everyone!

Monday, March 26, 2012

Kale and Sausage Ragu, over Grits. Yes, Grits!

Sausage, browned to sizzling goodness then simmered in a mildly spicy tomato-y sauce, with yummy healthy green kale.  And yes - there are grits too!  We like grits in this house, usually for breakfast...as most normal people do. So you wouldn't think that sausage ragu would go with grits. Just the sausage itself, maybe. But just trust me on this and try it for yourself.  This really is a warm comforting dinner on a cold spring night...which, apparently, only western Washington seems to be having these days :(  Boo to the warm weather everywhere else.


Kale and Sausage Ragu

1 lb bulk ground sausage (pork or turkey)
1 tablespoon olive oil
1 cup finely chopped onion
4 cloves garlic, minced
1/2 tsp ground cumin or 1/4 tsp cumin seeds
1/2 teaspoon red pepper flakes
4 cups roughly chopped fresh kale
1 1/2 cups marinara / pasta sauce
1/2 cup water

Brown ground sausage, and set aside to drain on paper towels. Heat the olive oil in a large skillet, and add the cumin when oil is hot. It should sputter a bit. Then add the onions and garlic, and saute just until translucent, about 4 minutes. Then add kale and stir well, let soften over heat for about 4 minutes. Then add the browned sausage,  red pepper flakes, pasta sauce, water, and bring the whole thing up to a boil. Then reduce heat to a simmer and let cook away for about 15 - 20 minutes. Serve hot over creamy parmesan grits (recipe below!)...enjoy!


Parmesan Grits

4 cups water
1 cup quick-cooking (5 min) hominy grits
1/2 teaspoon salt
1/4 teaspoon pepper
1/4 cup fresh shaved parmesan

Add grits, salt, and pepper to boiling water, and stir on medium heat for 5-7 minutes until thickened. Stir in shaved parmesan when done.

Saturday, March 3, 2012

Avocado Shrimp Salad "Boats"

Isn't it just better when veggies look like so much fun to eat?! Something magical truly happens when you take shrimp and pair it with avocado. Add the salsa ingredients to really kick it up a notch!


Avocado Shrimp Salad "Boats"


Recipe is as simple as can be. Toss together:  cooked shrimp, avocado, cucumber, tomatoes, red onion, jalapenos, cilantro, salt, lime juice. Enjoy! Great with tortilla chips, or, better yet, eat it in lettuce "boats". So fun!

Sunday, February 19, 2012

Kale Chips

My first attempt at homemade Kale Chips. Inspired by my friend Jennifer, at whose home recently I had the most wonderful Kale Chips, I decided to try making these. And...success! Why didn't anyone tell me how easy these are to make at home?? Not to mention, I would venture to guess that munching on homemade oven-baked Kale Chips is any day better for you than munching on fried things.


   Kale Chips


I started with a beautiful bunch of organic Purple Kale. Simply wash, rinse, rip into bite sized pieces, dry (this is where a salad-spinner is a huge help!), then toss with a bit of olive oil, salt and pepper, and bake on a cookie sheet at 350 F for 10-15 minutes. Results: crispy, yummy, wonderful green goodness. Enjoy!


Thursday, February 9, 2012

Spiced Chick Pea Soup

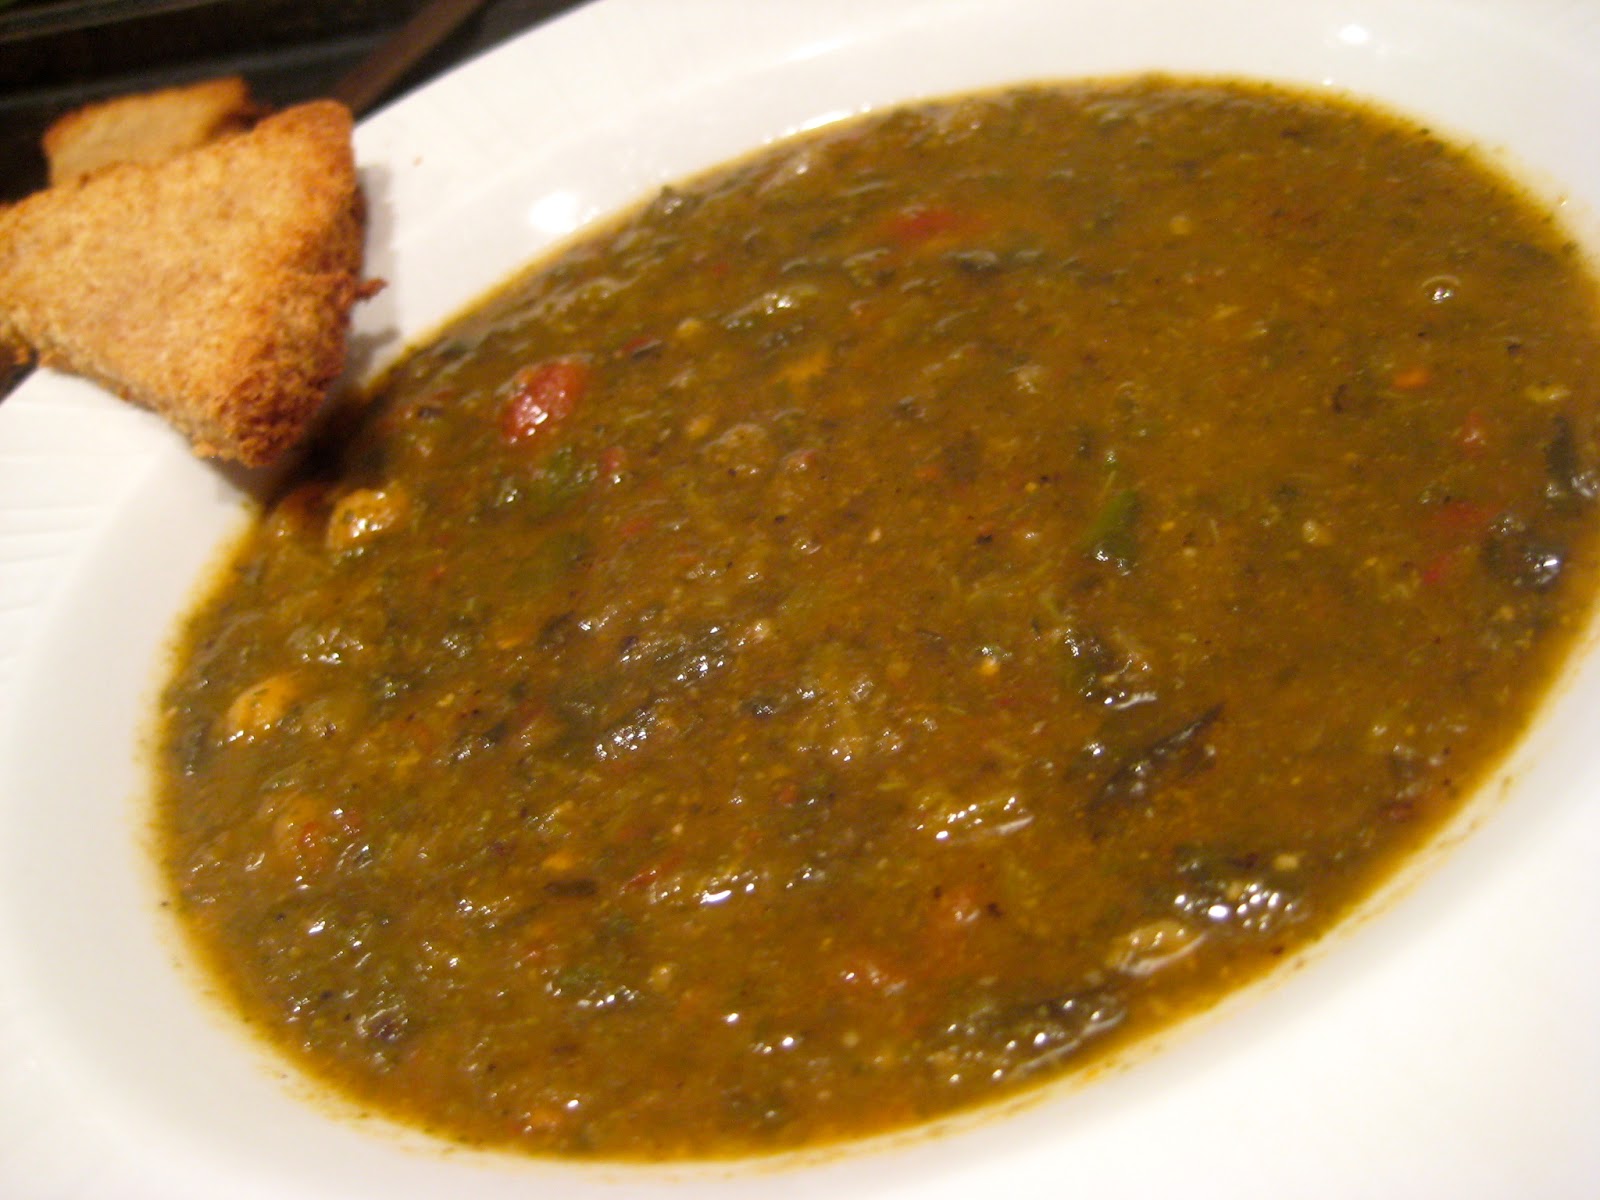
Chick peas, spinach, and tomatoes simmered in savory herbs and spices, with homemade garlicky crostini...dinner is served! This soup is perfect on a cold winter's evening, and very hearty for being completely vegetarian. Quick and easy to make, and, you will have plenty leftover for tomorrow's lunch!


Spiced Chick Pea, Spinach, and Tomato Soup


You will need:

2 tablespoons olive oil
1/4 cup chopped red onion
2 cloves garlic, finely minced
1 bay leaf
1/2 teaspoon cumin powder
1/2 teaspoon dried parsley
1/2 teaspoon dried oregano
3 tablespoons harissa (a versatile condiment well worth having on hand!)
1/2 teaspoon black pepper
salt to taste (I did not need to add any)
1 can chick peas (garbanzo beans), rinsed really well and drained
1 package frozen chopped spinach, thawed and squeezed of all water
1 can fire roasted tomatoes (regular diced tomatoes are fine too)
4 cups vegetable broth, warmed

Heat up the olive oil in a soup pot on medium heat. Add onions, garlic, and saute for a couple of minutes on medium heat. Then add the bay leaf, cumin powder, and dried herbs. Stir for a minute, then add the harissa paste and stir for another minute. Add pepper (and salt if you like), chick peas. spinach, and tomatoes with their can liquid as well. Stir well for two minutes. Add the warmed vegetable broth and bring the soup to a boil. Once boiling, lower heat to a strong simmer and leave uncovered for 30 minutes. Fish out the bay leaf. At this point the soup is ready to serve!
Or, you could remove half the soup, puree it in the food processor or with an immersion blender, then add it back into the remaining soup - this gives it a wonderful thick consistency and the textures play off each other really well!
Toss in some croutons or any kind of bread when serving. Enjoy!

Monday, February 6, 2012

Memories Of Potatoes And Marriage

We are just about halfway unpacked in our new home, after one full week. I had most of the kitchen unpacked within the first few days, therefore had few excuses not to start cooking right away. The only issue was, with not much more than a sack of potatoes in the pantry, I was at a loss for what to make for dinner (unless there was a harried rush to the grocery store involved - which is never a good idea where I'm concerned).

Then a memory came back to me about the first meal that my now husband (then boyfriend) ever made for me. We had been dating for about a month at the time, and he told me that one of his favorite foods was the mighty Potato. Ever the sassy one, I asked him to make me something with potatoes...and voila, he produced this amazing foil-wrapped roasted potato dish. Adding to the fact that this meal was prepared with care, I couldn't help but notice that this foil-wrapped method locked in all the yummy herbs and spices and infused the potatoes with their flavor in such a marvelous way. It is a stand-alone meal for us potato-lovers, but is probably better suited to being a side dish for normal folk!

I have since made my husband's special potatoes quite often and every time we enjoy this dish, those fond memories come rushing back. So, what better way to break in our new kitchen than to load it up right away with fond memories of our first meals together?

As an added bonus, I got to celebrate the fact that I finally have an oven that I can turn up to over 400 F without having to worry about an over sensitive smoke alarm!  :)


Foil Roasted Potatoes


You will need:

4-5 baking potatoes, cubed (we like skin on, but feel free to peel)
2 tablespoons olive oil
2 tablespoons butter, melted
2 cloves garlic, finely minced
1/4 tablespoon dried rosemary
1/4 tablespoon dried parsley
1/2 teaspoon black pepper
salt to taste
Aluminum foil

Preheat oven to 425 F. Toss all ingredients together in a large bowl. Tear off enough aluminum foil to cover a cookie sheet twice. Pour the potatoes over this double layer, then cover with another double layer of aluminum foil. Fold the edges over tightly, to make a "packet". Put the cookie sheet in the preheated oven for 20 minutes. Then carefully flip the packet over and bake for another 20 minutes. That's it. Enjoy! 

Sunday, January 22, 2012

Brief Goodbye...and Black Bean Tacos

Remember when I mentioned that we are moving again? Yep! We are moving into our new house later this week, and seriously looking forward to experiencing all the joys (and horrors) of home ownership once more. And, I'm excited about a more spacious kitchen. Don't get me wrong, I've enjoyed this apartment and it's closet-sized but nicely-outfitted tidy kitchen. However, I will NOT miss the over-sensitive smoke alarm that has caused our blood pressure to rise on many occasions. Still, this has been a terrific adventure so far, and we are so excited to move into our new home.

With the upcoming move, we have been making an effort to empty out the fridge and pantry of half-finished jars and bags of this and that. One very fruitful result of the purge was these wonderful Black Bean and Fish Tacos that we enjoyed for dinner last night. And they were so yummy! And so simple, you don't even need a recipe....as you can see for yourself :)

Black Bean and Fish Tacos


When you see me next I will be in my new kitchen. So, a brief goodbye, until next time!

Thursday, January 19, 2012

Harissa Marinated Chicken

Easy weeknight Chicken recipe...Tender chicken breasts marinated in harissa, yogurt, and olive oil. Does a chicken dinner get much easier or more delicious?  I think not!

Harissa, if you're not familiar with it, is a North African chile paste. You can find jars of it in the ethnic food aisle of many grocery stores.  Harissa is milder compared to some of the asian chile pastes, and its thick sauce-like consistency lends itself especially well to marinating. One or two tablespoons goes a long way! It is amazingly versatile and I love it! Marinating chicken in it, like below, is a great way to incorporate its unique flavor into your meal. And, the added yogurt ensures that the chicken stays very juicy. Enjoy the recipe!

Harissa Marinated Chicken


Serves four.

You will need:

4 boneless skinless chicken breast tenderloins
2 tablespoons harissa
3 tablespoons plain yogurt
2 tablespoons olive oil
salt to taste

Whisk harissa, yogurt, olive oil (and salt if used) together, and pour over chicken. Seal in a baggie and let marinate in the refrigerator for at least one hour. Heat a nonstick skillet to medium-high, put in the chicken (discard any remaining marinade). Cook on both sides until chicken is cooked through. Enjoy!

Tuesday, January 17, 2012

Bibimbap

We had some friends over the other night. They were kind enough to help us stack boxes to get ready for the upcoming move. (And, yes, we are moving again - but more on that later.) The evening's other activities included a rousing time of dance central - so much fun - and a healthy veggie-packed dinner (it seemed like a good idea, beyond just the fact that it is still early in the new year and none of us are bored with our resolutions. Yet :)  For dinner, I decided to attempt Bibimbap with a veggie/vegan spin.

In case you are wondering, Bibimbap is not just a funny word, it is a wonderful Korean dish that involves sautéed veggies and/or beef served over rice, usually accompanied by a fried egg on top. I have eaten it at restaurants, but hadn't yet attempted to make it at home. Also, in case you are wondering, it is pronounced "bee-bim-bahp"...in Korean this means "leftovers" or "mixed with rice" as Wikipedia so helpfully informed me.

What I love best about this dish is that you can use any vegetables you have on hand! I started with this very easy recipe from Serious Eats, and modified it to exclude the zucchini and daikon radish since I had neither on hand. I made the rice pancake as directed, but for the veggies I used only spinach, bean sprouts, carrots, and sliced shitake mushrooms. I sautéed the spinach and sprouts separately in sesame oil and red pepper flakes, then the carrots in sesame oil and a little honey, and then the mushrooms in sesame oil and soy sauce. Sprinkle sesame seeds on top if you wish.


Bibimbap


It turned out pretty well! We ate ours with a little soy sauce and sriracha. Yum! I like veering from the authentic versions to skip the meat. But next time I will definitely add a fried egg on top. That would make it a bit more authentic. And, let's be honest, I will eat just about anything with a fried egg on top. Enjoy!