Wednesday, August 27, 2014

Golden Beet Soup, with Goat Cheese and Braised Beet Greens

I first cooked with Golden Beets (or yellow beets?) last year when I saw them at our local Farmer's Market. This was a new food for me, they were tasty, and I was hooked. They taste less earthy than regular beets, but are just as delicious. Plus, the green tops are edible (and nutritious for the whole family, especially our primarily breastfed nine month old baby boy whose iron intake we've been careful to bolster through naturally iron-rich foods). So I got excited when I saw these special beets again this year, and couldn't wait to create something new with them! Last year, I learned that the beets taste amazing when paired with a little goat cheese, so I decided to explore that avenue some more.  This soup was very simply prepared but turned out well, and made enough to enjoy for lunch the next day (by which time it tasted even better).


Golden Beet Soup, with Goat Cheese and Braised Beet Greens

Serves 4 - 6

You will need:

3 big Golden Beets with green tops
1 tablespoon butter
pinch of nutmeg
1 medium onion, chopped
2 tablespoons olive oil,
1/2 teaspoon grated fresh ginger
5 cups chicken or vegetable broth
2 tablespoons lemon juice, plus zest of half a small lemon
Goat cheese - at least 4 tablespoons
salt and pepper to taste

Cut off the green tops about an inch from the base, wash well in cold water, dry, then chop into 1/2 inch strips and set aside.
Scrub grit off, then peel the beets. Cut off the top-part with the green stem remnants.  Dice the beets into 1/2 inch pieces and set aside.
Heat the olive oil in a soup pot on medium heat. Add the onions and let them soften and become translucent. Stir in the ginger, then add the beets, and broth. Bring up to a boil, stirring occasionally, then simmer covered for forty minutes or until beets are cooked through and break up easily with a fork.
While the soup is cooking, melt the butter in a small frying pan over medium heat. Add the beet green strips along with a pinch of nutmeg, and the lemon zest. The greens will release water and soften up in a couple of minutes, then remove from heat and set aside until serving.
Back to the soup - when the forty minutes have passed - check the salt, add pepper if desired. Add lemon juice. Give it a good stir. Then very carefully puree the soup using an immersion blender, or in small batches in a regular blender, until smooth. Reheat the soup before serving. Top each bowl with at least one tablespoon of crumbled goat cheese, and the reserved beet greens. Serve with crusty bread. Enjoy!

Note: I have also tried this soup with a splash of heavy cream stirred into the pot after pureeing. It adds a very rich taste, so go ahead and add it if you want that extra oomph. But it is unnecessary, the soup is just as velvety and tasty on its own.  


Wednesday, August 13, 2014

Blackberry Picking with Baby

Blackberry picking is one of our little family unit's summer highlights. Every August here in the Pacific Northwest, like it or not, these purple jewels take over the landscape. To some, they are noxious weeds to be obliterated, to others it is foraging at its finest. Every year Ryan and I brave their thorny defenses to pick several pounds of delicious blackberries. To eat, to freeze, to make our one year supply of jam, to fold into crepes, pies and crisps, to toss into breakfast cereal, to whizz into assorted beverages, and to do whatever else we like with them. One year, I discovered that if I made a sort of syrup out of them, I had the makings for a wonderfully summery (but completely unconventional) Blackberry Vodka Martini. So.much.flavor.

This year, with a nine-month-old in tow, it gets trickier. Since Johann was born we've continued doing the things we enjoy, and venturing out into the brush for berry picking is no different. (So far this year we've already foraged and enjoyed several different berries including salmonberries, red huckleberries, and thimbleberries.) With Ryan's help, it's relatively easy. One of us back-carries him in the Ergo, and aims for the easiest picking, while the other one dons long pants and boldly goes forth into the brush. Easy. So, I thought, why not try going on my own and just head for the easy picking?

So last week, I front-carried Johann (I cannot yet strap him onto my back without help) and we ventured out alone. We got in thirty minutes of picking before before nap time hit. Isn't this the sweetest grumpy face, you've ever seen?


We made it out alive, relatively unscathed, armed with two pounds of ripe blackberries. Not bad for a short time and a few extra challenges.    

I've learned now that blackberry picking with a baby strapped to your chest presents several challenges.


One: you have to go where the blackberries are, which usually means off the trails and into full sun where the best berries (and the thorniest brambles, unfortunately) reside.

Two: you have to pass up several obvious precious clusters of ripe fruit, they're now out of reach because of the much more precious baby strapped to your chest.

Three: not only do you have to try a little harder to keep your balance, and stay away from the thorns, you also have to keep your baby from reaching out and grabbing thorny leaves and branches! Oye. There were tears.

Bottom line. It takes time and effort, and maybe some pain if you get stuck by thorns, but there is good fruit out there for the picking, it is free, all natural, and we take advantage.


And, at the end of the day, with the baby unit, blackberry picking is so much easier with the help of another. So we plan to carry on this family foraging tradition, and raise Johann to find joy in free and delicious fruit. But next time, I'll bring the dad unit!

Thursday, July 31, 2014

Red Lentil Soup

Our little boy, now almost nine months old, loves lentils in all forms. We eat Dal (lentils simmered with Indian spices, typically served over rice or with breads) quite often here and, whenever we put some on his high chair tray, he eagerly reaches for it with his tiny little fists and tries to shovel it into his mouth as fast as possible.  So, yes, we think he either likes the flavors of Indian spices, or Dal itself.  Either way works for me, since lentils are cheap and said Indian flavors occupy a warm and cozy spot in my heart (which is great because I am Indian)!

This soup is inspired from Dal, but has a wonderful flavor which works even if you don't like Indian food, cooks up well in a big batch and is freezer-friendly. (In my experience, Dal, typically does not freeze well, so I was surprised when I discovered that this soup does - probably because it is already pretty broken down and pureed - read on.) I usually double the recipe and stash half in the freezer as soon as it has cooled, for a convenient dinner on a busy night. And why not? That just frees up more time for me to spend with chase after my little one!  


Red Lentil Soup


Red Lentil Soup

Serves 3 - 4

You will need:

1 cup split red lentils
2 tablespoons olive oil
1 onion, finely chopped
2 teaspoons finely chopped garlic (2 cloves)
1 teaspoon cumin powder
optional - 1/4 teaspoon red chili powder
pinch turmeric powder
1 tablespoon tomato paste
4 cups vegetable or chicken broth
1/2 cup water
salt and pepper to taste
1 tablespoon lime juice
Garnish:
2 tablespoons chopped fresh cilantro leaves
small pats of butter or olive oil to drizzle

Wash and rinse the lentils in several changes of cold water (at least three or four), discard all the rinse water and set lentils aside.
Heat oil in a big pot over medium heat, then add onion and garlic. Saute until translucent and edges of onion start to brown, about 4 or 5 minutes. Then add cumin, chili powder, and turmeric, stir for another minute.  Add tomato paste, broth, water, and lentils and stir well. Add salt and pepper to taste. Bring up to a boil, then simmer for at least 30 minutes with the lid mostly on (leave a gap for steam to escape), or until lentils are cooked through. Add lime juice and stir well. Then, with an immersion blender, or regular blender, puree the soup and keep warm until serving.
Serve garnished with cilantro and a pat of butter or a little olive oil drizzled on top if desired, with crusty bread and butter. Enjoy!
Note: this is a basic recipe, feel free to jazz it up with other veggies like carrots, celery, zucchini or, better yet, throw some crumbled bacon or browned sausage on top just before serving.

Monday, June 2, 2014

Our First Backpacking Trip with Baby

We just returned from our first backpacking trip with Johann, and thought we would document a few notes for anyone who is interested. Spending time outdoors, in the heart of nature, recharges us in a way that not much else does. Not only does it provide some R & R, it lets the unimportant things and distractions of daily life fall away so we can fully appreciate God's creation all around us. For us, getting outside is a form of worship. And this is a key family value that we want to impart to our baby, Johann.

I had done some reading about backpacking with babies. We knew it was something we wanted to do as a family, and were happy to find that there are a lot of others who feel the same way. I gleaned some wisdom and got inspired by blogs and WTA trip reports I read about other families who backpacked with babies.

We chose a hike that we were familiar with and thought it would make an easy backpacking destination with baby. Barclay Lake is a small, quiet sub-alpine lake in the Mount Baker National Forest, reached by a 2.25 mile hike with an easy grade.

We had a bit of a bumpy start as Johann had a "blow out" while we were still at the trailhead, just getting our gear ready to go, forcing us to do an outfit change when we hadn't even left yet! Good timing, in hindsight.

When we reached the lake - being the only ones there - we had our pick of campsites. We chose a secluded, beautiful spot by the lake and set up camp.

Our private campsite by the lake

While hiking, Johann was happy to ride in the Ergo, either napping or enjoying the scenery. At camp he had more freedom, so it was a little more challenging with one of us watching him pretty closely at all times. He is not yet crawling, but still got into some mischief! He entertained himself with things like mugs, spoons, and dirt - of course. I was more relaxed when I realized he was going to keep finding the dirt, no matter what. He was especially fascinated by the inside of our tent.

Fascinated by the tent

But we had a few challenges.

Sleep was by far the biggest hurdle. He was content to stay up with us until 10 pm, when the light faded, and woke up EARLY, with the sunrise, ready to start the day at 5:05 am! The cold was another challenge, as overnight temps dropped into the low 40s. It was a bit warmer inside the tent and Johann was pretty bundled up inside Ryan's sleeping bag, but we were still worried. Tasks that went easier with two people, like setting up the tent and stringing up the bear bag, were also a bit of a challenge. Finding a way to keep Johann occupied was not the easiest, so we had to do things in short stretches of time.


Entertaining himself with a spoon while we cooked breakfast

Overall, he was kind to us and seemed to enjoy all facets of the experience - exploring with us (a lot!), sitting on the beach, gazing up at the mountains, stars, and the magnificent forest canopy, smiling sweetly at the few fellow backpackers who we ran into later, all the birds and various nature sounds.

Exploring with Daddy

The north face of Mt. Baring

Barclay Lake looking east

Ryan and I had distributed our pack weights so we each carried 38 lbs, including Johann whom I front-carried in the Ergo. We had definitely overpacked, but we figured that was safer than leaving an essential item behind the first time. We didn't end up needing more than half the diapers we had packed (we used disposables for the trip.) We did not skimp on diapers, clothes/extra layers, and food for ourselves. Johann is breastfed so nothing extra to carry there. We packed two thin burp cloths, but decided we can make do with our bandanas and washcloths next time. If the weather is dry, we can wash and dry them in time for reuse.

On the whole, we had a wonderful time, loved the sense of accomplishment since this was a big goal for us, and returned recharged! The lake and vistas were gorgeous, and we enjoyed the peace and quiet.

Mt. Baring at sunset
Barclay Lake at sunset


The reflection of Mt. Baring in the lake at sunrise

We are glad we did this before Johann started to crawl, and we will be doing it again soon. I'm sure a crawling baby will bring a host of new challenges so it will be interesting. We'll be sure to share anything new that we learn.

P.S.: Neither my husband nor I know anything about taking pictures, but we thought these turned out rather nicely. None of the images have been edited in any way.


Friday, May 16, 2014

Inspired by Misticanza: Pasta with Ricotta and Wilted Garlicky Greens

I had never heard of "misticanza" until a few months ago while reading an article about springtime in Italy. Basically, "misticanza" is Italian for mixed wild herbs, generally tossed together in a salad. The word came across my mind again this week, creeping up on dinnertime, and all I could think was that I wanted to eat some greens. Like right now.

So, dinner was decided then. Rigatoni tossed with creamy ricotta, garlic sliced and fried just until golden brown, and whatever greens I could get my hands on (we only had arugula in the refrigerator so I used that) quickly wilted in that same pan with the remnants of the garlic oil, generously sprinkled with sea salt and freshly grated parmesan. To round out the dinner plate, I added a bruschetta, of sorts, that my husband and I love, with garlic, fresh tomatoes, basil, and a squeeze of lemon. Tasty. Simple. Wholesome.  

(And, until I actually go to Italy, hastily cobbled together yet delicious concoctions such as these are more than enough. For now.)


Rigatoni with Ricotta and Wilted Garlicky Greens

Serves 4

You will need:

Half a 12 oz. box of dried rigatoni (or any short pasta),
4 tablespoons ricotta
3 cloves garlic, thinly sliced
2 semi-packed cups greens (I used arugula)
1 Tablespoon + 1 teaspoon extra virgin olive oil
1/4 teaspoon freshly ground black pepper
sea salt - to taste
freshly grated parmesan - to taste

Cook pasta according to package directions, drain, and toss with 1 teaspoon of the oil. Set aside in a large serving bowl.
Heat remaining oil in a small frying pan on medium. Add the garlic slices, and fry just until golden brown (took about a minute on my stove). Then add the greens and let them wilt, this should take another minute. Add this, the ricotta, and pepper to the pasta and give it a good stir until the ricotta is well incorporated and it all comes together. Serve with sea salt and parmesan. Enjoy!

Note: if you have any of this leftover, it is better to eat it cold or at room temperature rather than heated. 

Thursday, May 1, 2014

Chipotle Carnitas Mac n' Cheese

With a new baby around, going to the grocery store has become quick business. Get the list, go in and come out before any potential for a mama or baby meltdown. So, of course, I now delay grocery shopping for as long as possible. Last night, with an "open" dinner plan, I wondered what I could do with some leftover carnitas and a pantry full of dried pasta. Turns out, lots.

By the way, if pasta is not your thing, venture back to the obvious yet delicious. Fold it into an omelet. Stick it into a quesadilla or grilled cheese sandwich. Use as the meat in your favorite chili. Make Dumplings, or Pork Buns. Or curry it up and heap liberally over rice. So. Many. Options.

But back to that pasta.

Despite my butchery of international cuisines here, this is delicious and really works. A little smoky chipotle flavor adds depth and heat - leave it out if it's not for you. Oh, and did I mention that it can be made ahead? I put it together during nap time, and let it sit in the fridge for a few hours, then put it in the oven right before we ate, freeing up my hands and time for the pre-dinner meltdown that ensued. But, at the end of the day, baby was calm again, and we had a tasty cheesy pasta dish with just the right balance of textures adorning our dinner plates. Life is good.


Chipotle Carnitas Mac n' Cheese
Makes 6 to 8 servings

You will need:

1 box dried pasta shells or macaroni (I used a13.25 oz box of Whole Grain Shells)
4 Tablespoons unsalted butter
4 Tablespoons flour
2 cups nonfat milk
1 cup shredded mexican blend cheese
1/2 teaspoon cumin
1/2 teaspoon oregano
2 teaspoons chopped up chipotle peppers in adobo sauce
2 cups cooked shredded pork

Cook pasta according to package directions, set aside. Melt the butter in a large saucepan over medium heat, then stir in the flour to make a roux. Slowly pour in milk, whisking well to prevent clumping. Once the sauce has slightly thickened, remove from heat. Add cheese, chipotle peppers, cumin, and oregano. Stir until cheese has completely melted and spices are incorporated. Combine the sauce with the cooked pasta, and pork and pour into a 9x13 baking dish. (You can now cover it and put it in the refrigerator until ready to bake, or up to 12 hours.) Add topping if you choose to (see below), then bake uncovered at 375 F for 30 - 45 minutes, until the sauce is bubbly and topping is golden brown. Enjoy!


Topping:
1 tablespoon unsalted butter
1/3 cup breadcrumbs
1/4 teaspoon cumin
1/4 teaspoon oregano

Just before baking, melt butter in a small microwave-safe dish or 20 seconds, then stir in breadcrumbs and spices. It should be crumbly. Sprinkle over pasta before baking.

Monday, January 27, 2014

Butternut Squash and Apple Soup


You might ask, where have I been these past few months? I might say...having a baby. This blessed event occurred last November, but only now do i feel the fog of new motherhood lifting and am once again happy to resume experimentation in the kitchen. Content as I am to do little more than care for my precious baby boy, this foodie will go crazy if she does not get her kitchen zen in daily doses.

But back to this soup.

Despite a recent spike in unseasonably warm sunny days here in Seattle we're still enjoying various winter comforts, richly fulfilling squash soups being chief among them. This one has a few tart apples tossed in, giving it a nice lift in flavor. (Cooking with apples in savory uses is highly underrated, in my humble opinion.)


Butternut Squash and Apple Soup


This Butternut Squash and Apple Soup is simple to make with just a few ingredients, and has all the richness of a creamy soup without having any actual cream in it. (Two key factors to a new mother who enjoys food but has less time to devote to making it these days.) But it freezes like a dream, so make a big batch and let it feed you twice, or thrice. 


Butternut Squash and Apple Soup


Serves 4 - 6


You will need:


1 tablespoon extra virgin olive oil
1/2 cup finely chopped white or yellow onion
2 cloves garlic, minced
1/2 teaspoon allspice
optional - 1/2 teaspoon red chili powder
3 packed cups mashed roasted butternut squash (Note: I roasted a medium sized butternut squash and had 2 cups leftover. Use it to make risotto or red curry!)
3 small apples, cored and roughly chopped, with skin on
4 cups vegetable broth
pinch black pepper
salt to taste


SautĂ© onions and garlic in olive oil in a fairly large soup pot on medium heat. 


Add the spices and stir a minute or two, until the onions are well coated and fragrant. Add the apples and roasted squash, stir well. 


Add pepper and broth, bring up to a boil, then cover and let simmer for 30 minutes. Carefully puree the soup in batches in a food processor or using an immersion blender, then return to pan and let simmer until serving. Salt to taste. 


If you like, top the soup with a little greek yogurt or roasted butternut squash seeds. (Save the seeds, rinse off any fibers, pat dry, stir in a little butter and salt, spread on a baking sheet and roast at 350 for 10 minutes or until they start to "pop.") Serve with crusty bread, or just plain ole' buttered toast. Enjoy! 

Monday, September 16, 2013

Pears and Ricotta on Toasted Multigrain

This is my new happy mood breakfast. Or brunch. Or dinner. Or snack. It really just makes me smile!

Pears and Ricotta on Toasted Multigrain

Easy as pie, and tastes sort of like it too. There's really no exact recipe. And feel free to use any kind of fruit; I only used pears since it's the season and we were blessed with quite a few this year. But here's what you do. Mix up some ricotta, with a bit of lemon zest and fresh grated ginger and refrigerate until ready to use. Slice up some pears and caramelize them in a bit of butter, cinnamon, and brown sugar. Slice up some multigrain bread (or any bread), and toast it. Spread with ricotta, top with the sliced pears and then, if you like, drizzle some of the pan butter on top.

Brunch. Or Dinner!

The only thing left to do is to eat it all up immediately. Just as we have, in our house, four times in the last week. Enjoy!

Thursday, July 18, 2013

Asparagus Shrimp Stir Fry (10 minute dinner!)

With the asparagus season so short lived, you want to take advantage. I've already filled my freezer with beautiful whole asparagus spears and cut asparagus to tide us over until next spring, and I still can't get enough of eating it fresh. What could be better? Ten minutes to dinner? Yes, please! The ultra easy recipe follows below.

Asparagus Shrimp Stir Fry

Asparagus Shrimp Stir Fry

Serves 3-4

You will need:

1 1/2 lbs fresh asparagus, cut into 1" or 2" pieces
2 cups frozen cooked shrimp, fully thawed, tails removed
1 tablespoon sesame oil
1/3 cup any stir-fry sauce
optional - 1/4 teaspoon crushed red pepper
optional - sesame seeds

Heat up the oil in a large saucepan over medium heat. Add asparagus and sauté stirring now and then just until lightly browned, about 2 minutes. Stir in shrimp and allow to heat through, about 2 minutes. Add the crushed red pepper if you like, then the stir fry sauce. Stir it well, turn off the heat, cover the pan and let sit for a minute. Serve over hot rice, topped with sesame seeds if you like. Enjoy!

Monday, July 1, 2013

Yellow Beets, & Yellow Beet Risotto

I found some bright, delicious-looking organic Yellow Beets at the farmer's market on Saturday. Gorgeous, huh?  I've been in a risotto sort of mood lately, so, despite the 90-degree weather Seattle has been experiencing this week, I decided to turn on the stove and make a yellow beet risotto.

Yellow Beet Risotto

Boy, am I glad I did. I used my basic risotto recipe, using red onion instead of white and skipping the garlic and wine (you don't need them here!), and substituted the yellow beets plus their chopped up greens in place of whatever veggies I would normally use. A splash of balsamic vinegar, and a sprinkling of goat cheese added the final touches and kicked it up a notch! It was the perfect dinner on a warm summer evening. It tasted like summer, and was just oh-so-yummy!


Yellow beets - I will definitely be cooking with you again.  

Thursday, June 27, 2013

Foraging: Red Huckleberries!

Red Huckleberries are slowly starting to ripen in our area. Red Huckleberries, while abundant in the Pacific Northwest, are a pain to pick because the berries are tiny and the entire bush moves when you pluck just one. But the effort is well worth the reward. We only learned about these babies in the middle of its season last summer, but are ahead of the game this year so will be taking full advantage of the entire picking season!


We enjoy eating these little red gems just plain on cereal, granola, or sprinkled into salads. But local experts have many more clever recipes that use red huckleberries. The berries are a bit on the tart side, but juicy and slightly sweet, making it perfect for jams as well. And, boy, are they delicious any way you eat them!  


Unable to wait a minute longer, we picked a modest 4 oz. at the park down the street from our house last night in the last few minutes of sunset, deciding to save more serious picking for the next few weekends. If we can get to them before the bears do! 

Tuesday, June 18, 2013

Peanut Butter Oatmeal Squares

Peanut Butter, Oatmeal, and Chocolate are all popular foods with the husband. And I am a big fan of anything that is a salty-sweet combo...a major exception to the fact that I have more of a salt-tooth than a sweet-tooth. So, peanut buttery-oatmealy-chocolatey treats are sure not to last too long in our house. Which is probably why I don't make these kinds of things very often. Plus, I am not a baker.

But, I did put these Peanut Butter Oatmeal Bars together in about ten minutes, with only ingredients I happened to have in the pantry, and had time to wash and put away all the ingredients and baking things while it sat in the oven. They are not too sweet, dense and hearty, and very filling as a snack or dessert, or grab n go breakfast. And, since this recipe does not contain any oil, butter or eggs, the "worst" ingredient in here is brown sugar, or chocolate chips if you choose to add them. So, an overall winner recipe in my mind!

Peanut Butter Oatmeal Squares (or Bars)


This recipe makes an 8"x8" pan's worth. I won't bother to list how many servings that is, but if you cut your squares small, probably around nine or twelve total servings. If you have at least two people around and it lasts you more than two days I will have to seriously judge you.

You will need:

3/4 cup peanut butter (I use either Trader Joe's or Skippy Natural chunky)
1/2 cup brown sugar
1 Tbsp real vanilla extract
1 cup old fashioned rolled oats
1 cup flour (whole wheat or unbleached all-purpose flour work fine)
pinch salt
1 tsp baking soda
1/2 cup milk (we use skim)
Optional mix-ins: 1/3 cup chocolate chips, 1/3 cup chopped roasted peanuts, or three tablespoons of each!

Preheat oven to 350 F. Cream brown sugar and peanut butter together with a hand mixer for about 2 minutes or until well combined. Add vanilla extract, mix for another minute or so. Add remaining listed dry ingredients through milk, and mix again until the dough is crumbly and well combined. Add milk, mix again until the dough gets sticky.  Fold in the mix-ins. Scoop the dough together, and dump it all into an 8"x8" pyrex dish, press down evenly. Bake for 20 minutes. Let cool completely, then cut into bars or squares. They will be cookie-like on the outside, and chewy soft in the middle. Store in an airtight container at room temp, or freeze for later. Enjoy!

Monday, June 17, 2013

summer's first strawberries

The little strawberry patch has been thriving at our new place, and the first berries ripened over the weekend. We picked nine strawberries and found them to be so precious a treasure that we ate them right away, savoring them to the last juicy bite. There might have been a couple more berries, but, alas, it looks like we had to share them with birds and other creatures. This is definitely one drawback to pesticide-free, organic gardening, but it's a price we're willing to pay for what we get out of it.


We'll have more strawberries ripening soon, and I can't help but remember how impatient I was last year when we put this patch in, picking off the blooms that first year and urging the plant to hurry up and grow! And now I think this was so worth waiting for. Look at how gorgeous our berries are!


I've been amazed over the years at how easy it is to grow and care for strawberries, and how sustainable a crop it is since it expands and produces more all on its own. You won't get a yield the first year, but the following year you will have several berries and be amazed! We started our patch with five June-bearing plants last year, deliberately picking a mix of two different varieties that do well in the state of Washington, and now we're seeing pretty decent results, with having put in very little weeding or maintenance the past year. At only 2 feet by 8 feet, this a small strawberry patch by most standards, in a sunny but otherwise unused spot along the side of the house. It will yield enough for us to enjoy in-season, but not enough to can or freeze or do anything. So we're starting to scout out a little more space in unused corners of our yard, to put in a new patch, and hopefully, double our yield in two years. Maybe then we will have enough to make jam, and freeze for our smoothies, desserts, and whatever else we do to enjoy these babies through the rest of the and until the following June when we will see them again. This is too precious, too sustainable, and too easy a fruit to grow to ignore its potential!


Thursday, June 13, 2013

Red Russian Kale, oh the possibilities!

I planted a new variety of kale in my little garden this year. Red Kale. Red Russian Kale, to be exact. It is much more tender and delicate than the Dwarf Blue variety we planted for the second time this year. I had only planted one row, as I do with most new seeds but, after having cooked a few meals with it this week, I am so happy with the results and am kicking myself for not having more available right now!

Red Russian Kale Omelet

With that said, I am savoring every bite of what we have available to harvest now...we put it on grits for dinner the other night, alongside caramelized onions, and a fried egg on top. And, filled it into omelets for breakfast this morning with roasted garlic, a bit of thyme, and shaved asiago cheese. Tasty.

Red Russian Kale
This Red Russian variety - according to my research - tends to develop more flavor after frost (and freezes well, as all Kale does), so I think I will plant a few more rows in mid-to-late summer so we can continue savoring this tasty green treat through the winter months.

Friday, May 10, 2013

Farmers Market Opening & Potato Leek Soup

Our local farmers market opened for the season last weekend. We were there bright and early, sporting reusable totes and big smiles on our faces. The weather could not have been better, sunny and in the upper seventies, and lucky us since this is atypical for our area in early May. We wandered around with our friends, took in the sights, smells, sounds, colors, fed the Alpacas and returned home armed with plump happy fruits and veggies for the week including the freshest, biggest bunch of Leeks one could find (for $2!).

We whipped up this rustic, comforting, potato leek soup that same day and savored dinner out on the back porch enjoying those last few moments of warmth just before the sun went down.

Potato Leek Soup
Serves 4-6

You will need:

3 Tbsp butter + 1 Tbsp olive oil
3 good sized leeks, chopped up (use only the whites and light green portion)
4 smallish Yukon gold potatoes cubed (we leave the skin on)
5 cups chicken or veggie stock
1 bayleaf
freshly cracked black pepper – optional

Add butter and oil to a heavy bottomed pot and let butter melt over low heat. Stir in the leeks. Cover and cook on low for about 10-12 minutes, stirring every once in a while to prevent the leeks from burning (trust me it’s easy to burn them, been there done that). Add bayleaf, potatoes, and veggie stock, bring to a boil then cook on low for 10-12 minutes or until potatoes are done. Toss out the bayleaf. The soup is ready; it may be slightly thin right now, but it will thicken up and get a gorgeous velvety texture as it sits and the potatoes start to disintegrate even more (this recipe makes a ton for just two so your leftovers the next day will be awesome!). But I also think that is part of the rustic appeal of this soup.
Serve soup hot topped with freshly cracked black pepper if you like, with good fresh bread. Enjoy!

Tuesday, April 30, 2013

Foraging: Stinging Nettles

Since moving to the state of Washington, I have been swept away by the foraging possibilities - both abundant and nearby. I have been devouring all kinds of information on the subject, learning about different things to look for by season. Winter is over here in the Pacific North West, and that means yummy stinging nettles are in their prime.

Stinging nettles - which lose their "sting" after being cooked for one minute - are easy to identify, and deliciously yummy. They remind me of spinach, but maybe a bit woodsier. I now substitute them for pretty much any dark leafy green veggie in recipes. Not only are stinging nettles pesticide-free gifts of nature, but according to my research, they are also a nutritional powerhouse, chock full of all the dark-leafy-green veggie benefits including iron, calcium, and folic acid.


In early spring, we donned long sleeves and pants, gloves, and boots, and ventured down to the nearest trails to pick our first lot. A modest half grocery bag's worth.


Never having cooked with Stinging Nettles before, I wanted to tread lightly. Even my husband (who generally does not get as excited about food) was all too eager to help me pick them, probably in large part for the fact that he got to jump into the weedy shrubs, thorns and brambles and be a little boy again. And we had two other adorable helpers.


You are supposed to harvest only the top two or three bracts of the plant while they're still young, so they have a chance to keep growing (at which point you can go back and pick more yumminess!) and snip off the leaves to cook with.


Unable to avoid curiosity, we cooked up that first batch immediately. Oh.So.Tasty! You cook them for a minute (which will disable the sting), then however your recipe calls for your leafy greens to be cooked.


It cooks down almost exactly like spinach, in the fact that it loses as much water.


Since then, we have gone back again and again and have picked many more bags full. Boy-oh-boy we have discovered a whole new world and have had so much fun experimenting with it in different dishes. Stinging nettle and garlic homemade deep dish stuffed crust pizza, anyone?

Or, simply tossed into boring old spaghetti sauce? Or, perhaps a semi-foraged version of delicious Indian Palak Paneer? The possibilities are endless. Thank God for these simple delights of nature.


Sunday, April 28, 2013

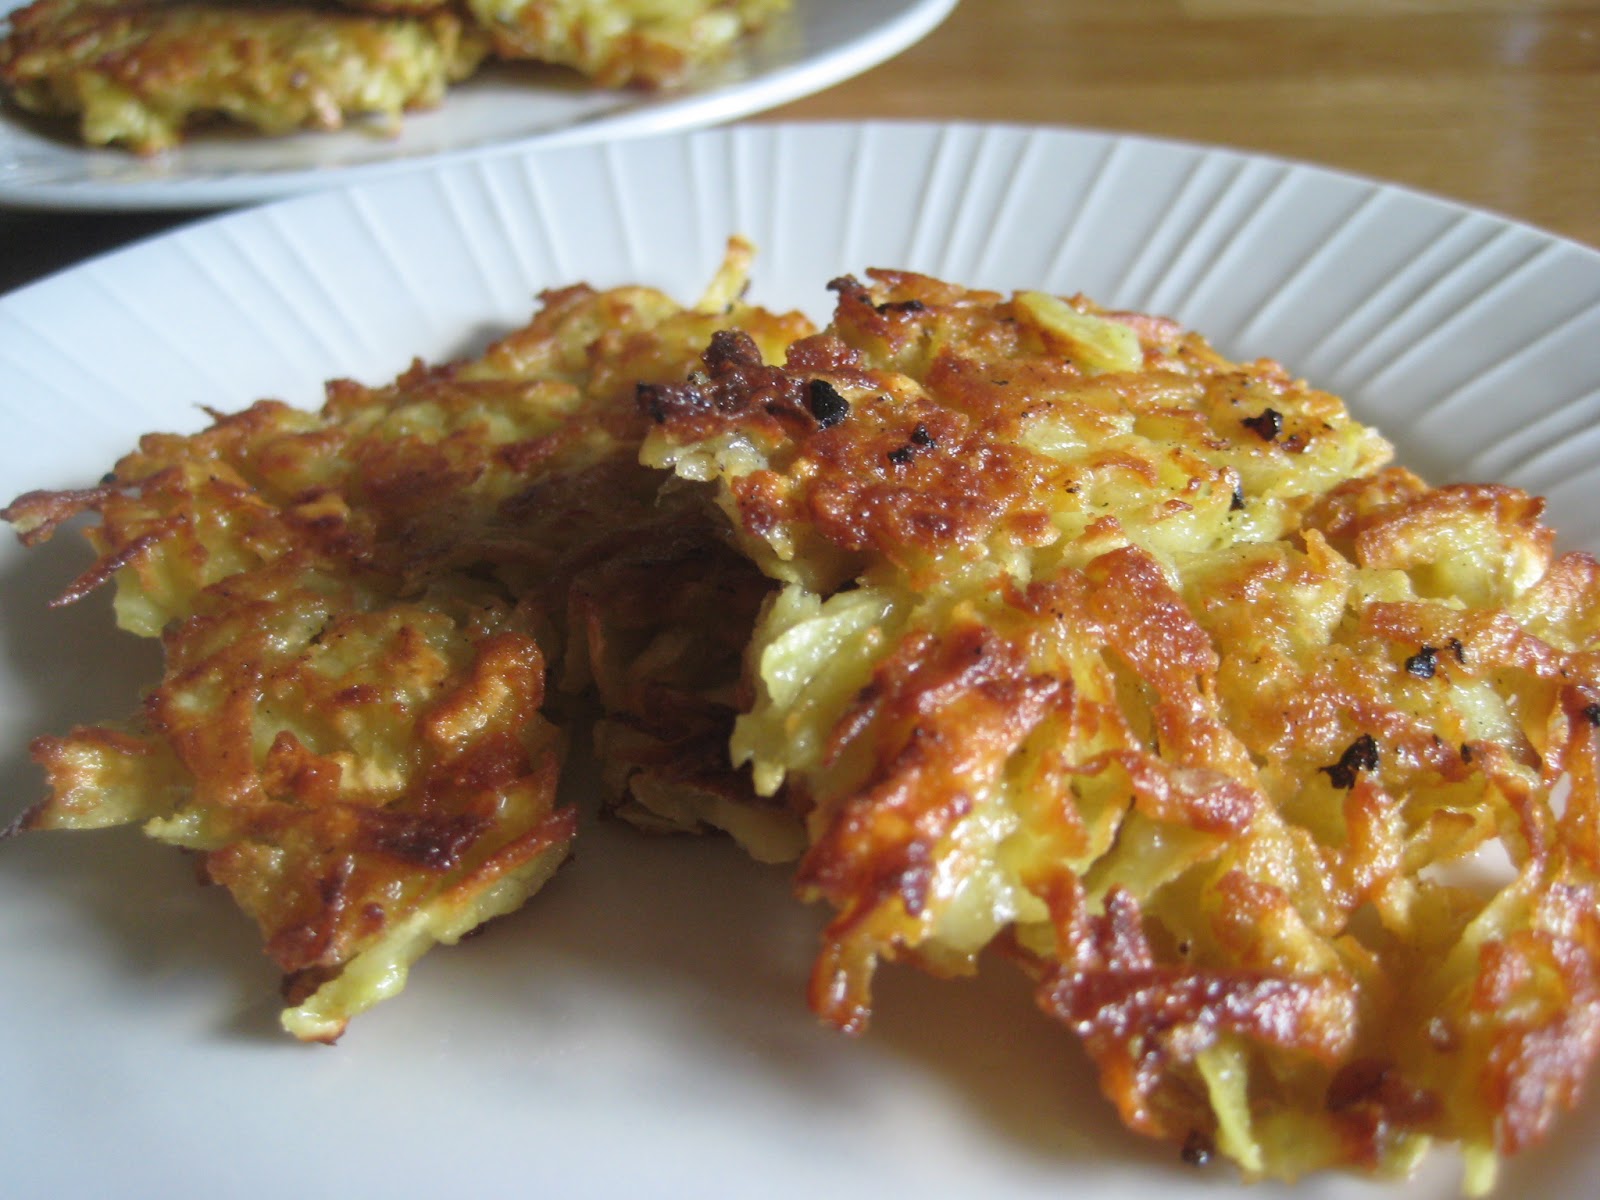
Sweet Potato Latkes


I love latkes. Regular potato latkes. I have also never met a sweet potato we didn’t like. Stay with me, I have a point.

All of a sudden, a craving for crispy potatoes hit. Easily fixed. A quick glance in the pantry confirmed only one small lonesome Yukon Gold potato, BUT…an ample supply of plump sweet potatoes. So...Sweet Potato Latkes here we come!

The following isn’t so much a recipe, as a suggestion of directions. The key is to squeeze all moisture from the grated sweet potatoes, otherwise they will not crisp up and turn golden brown as beautifully as they should. Other ingredients you might include with two grated sweet potatoes: ¼ cup finely chopped onion, scant 1/3 cup all purpose flour, 2 eggs, salt and pepper, and of course some oil and a cast iron skillet for frying.

Peel. Grate. Squeeze. Mix. Fry. Eat.


Sweet Potato Latkes

I like that this dish is not as heavy as sweet potato casserole or as greasy as fries. Rather, they end up some happy place in between. And fairly light if you only eat one or two – which may be challenging given how tasty they are! Plus, they just look special and different. Perhaps fancy enough for an appetizer, or to add a crisp element to a meal if you need that. Enjoy!

Wishing everyone a beautiful Spring.

Saturday, March 30, 2013

Banana Nut Pancakes, the Lazy Girl's way

Banana pancakes are good. Nut pancakes are better. When you put them together, they're great. But when you want to enjoy a quiet, lazy Saturday morning, and still make the most of the day, you get this. Banana Nut Pancakes, courtesy of the Lazy Girl (that would be me).


Banana Nut Pancakes

How do I make this happen, you might ask? Start with any pancake batter of your choice. Slice up a ripe banana or two, and find some nuts. Proceed to pop all but half the amount of banana slices in your mouth, then save the rest for your pancakes. (After all, that was the original intent except for the fact that banana slices are so yummy.)

Top each pancake like a pizza with a few banana slices, and a sprinkling of nuts just after you put some batter in the pan. Like so.


Flip and cook as you would normally. 


Easy, caramelized, deliciousness. Genius, no? Drizzle on maple syrup. Or don't...feel free to be boring like that. Enjoy!

Friday, November 9, 2012

Black Bean Tortilla Soup...in a Crock Pot!

I recently met a few people who do not own slow cookers or crock pots. How can this be? If you are one of those people, I highly recommend getting one. In fact, ask for a crock pot this next Christmas. I inherited mine from my mother-in-law. It’s a circa 1970s original Rival "crock pot" that weighs about as much as I do, and I absolutely love it. It is an integral part of my kitchen, and gets heavy use in the fall and winter months. Combine this genius little invention with a delicious soup recipe and I’m all set. This black bean tortilla soup is not only nutritious, delicious, so easy to make in a slow cooker, and cheap, it’s also completely vegetarian – actually vegan! (Well…beans have other “benefits”, of course.) Talk about your healthy comforts.

Black Bean Tortilla Soup

You will need:
1.5 cups dried black beans, soaked overnight
1.5 cups of any combination of finely chopped onions, bell peppers, celery, carrots, etc.
1 can diced tomatoes, juice and all
1-2 cloves garlic, finely minced
1 tbsp of bottled chipotle sauce
½ tsp cumin powder
6-7 cups of veggie stock
1 tbsp of olive oil
Optional – salt if needed (we skipped)

Toss everything into your slow cooker / crock pot, cover, turn on “low”. Then walk away. (Or go to work!) Come back after 9-10 hours. It should be ready to eat and delicious. Give it a good stir before serving. Optional - top with tortilla chips, cilantro, and/or avocado. We did all three and it was fabulous. Enjoy!

P.S.: you can also cook on “high” for 4 hours, then “low” for 2 hours.

Wednesday, October 31, 2012

Happy Halloween!

Happy Halloween, all!  Aren't these little owl cupcakes cute? 


Have a safe evening out there!